Frequently Asked Questions
- How to hide the powered by Regula watermark?
- Where can I find the list of documents presented in the database?
- How to collect logs?
- How to Submit a Code-Level Incident
- Code signing "DocumentReader.framework" failed: Troubleshooting
- How to calculate the final app size?
- What are the bundle ID and application ID?
- Why does Apple reject my app after integrating Document Reader SDK?
How to hide the "powered by Regula" watermark?
Trial license keys have the powered by Regula watermark by default. Please reach out to our Sales Team to discuss the presence of the watermark on the scanning screen.
Where can I find the list of documents presented in the database?
How to collect logs?
Please navigate to the Logging page.
How to Submit a Code-Level Incident
If you are having a problem with some code while implementing our products or have other questions about your code implementation, preparing a short example is very useful. Our Technical Support Team can help troubleshoot your code or investigate possible workarounds to fast-track your development.
Before Submitting an Incident, be sure to
- Read and follow the guides described in this documentation.
- Update to the latest stable version.
- Search for your issue in the existing GitHub issues.
When Submitting an Incident, follow these guidelines
- Provide a clear and detailed description with as much information as possible. Include steps you’ve taken to solve the problem and conditions we should consider (such as failing on specific hardware or OS version).
- Avoid using acronyms, jargon, and nonstandard abbreviations.
Include the following items to your Incident
- Crash reports and logs that you have in regards to your question, if applicable.
- Any console output containing errors or exceptions when building or running your app, if applicable.
- Screenshots, if applicable.
- Isolate the issue into a sample project with a minimum possible code and attach it.
Tricks for trimming a sample project
- If the GUI has 30 buttons not related to the problem, remove them. If they are related to the problem (you remove them and the problem disappears) put one or two back in, if the problem reappears, include only those one or two buttons.
- The array or table that is causing a problem may have a hundred entries, but again, if the problem can be seen with two or three entries, trim the example to that alone.
- If the project contains 30 frameworks, except ours, remove them. If they are related to the problem (you remove them and the problem disappears) put one or two back in, if the problem reappears, include only those one or two frameworks.
Can I submit an Incident to get help with beta version of our products?
Yes. First, test and confirm that the issue reproduces on the latest beta. If it does, submit the results of your testing to us.
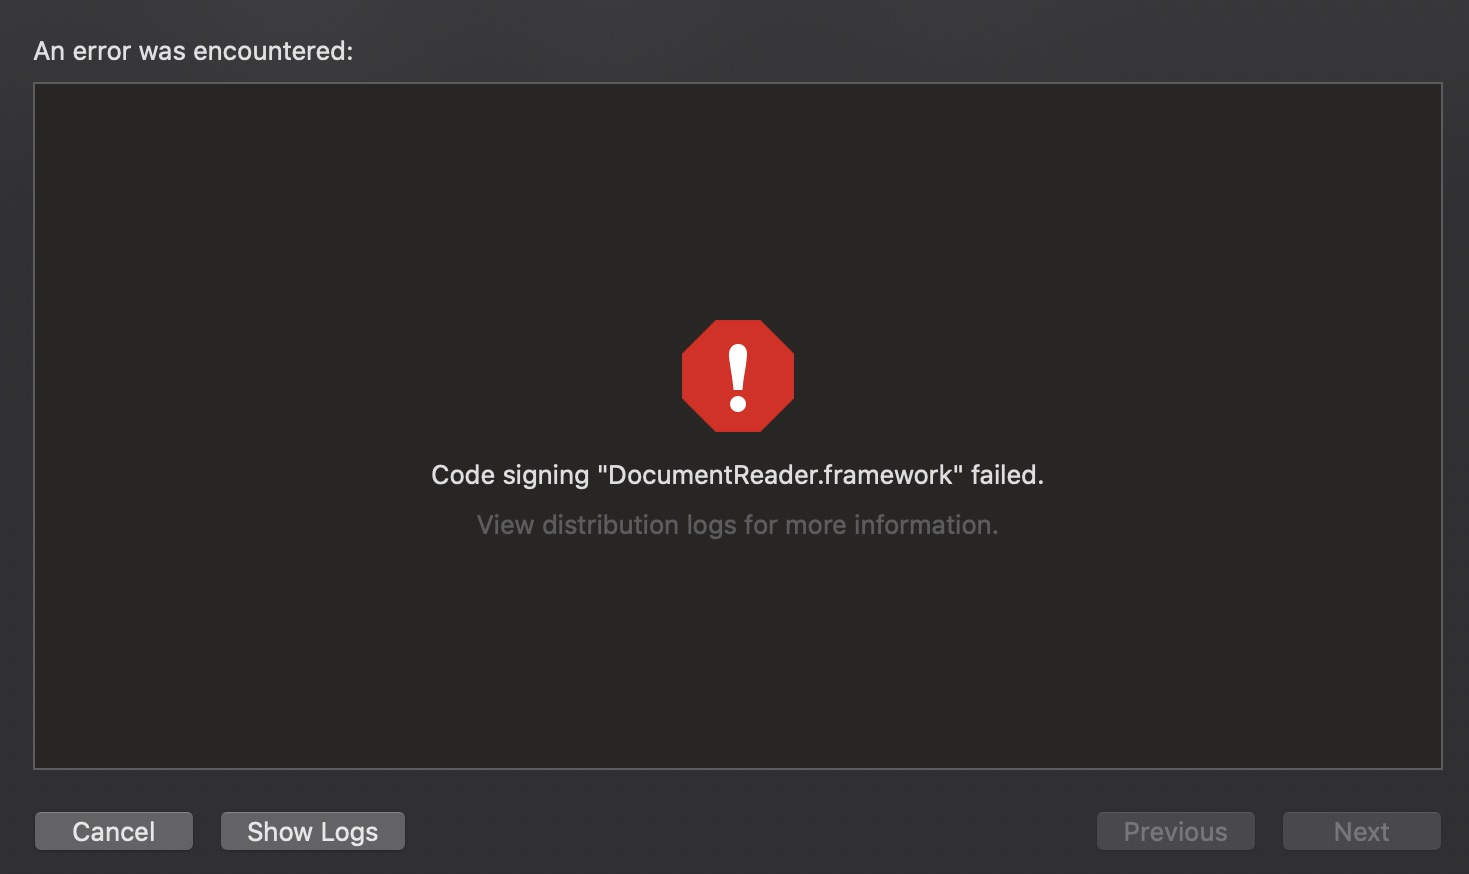
Code signing "DocumentReader.framework" failed: Troubleshooting
If the frameworks are integrated to the project manually, you may encounter the issue App Store Connect Operation Error. ERROR ITMS-90087: "Unsupported Architectures" / Code signing failed:
Our frameworks support two architectures for device deployment:
arm7, an older variation of the 32-bit ARM CPU, as used in the A5 and earlier.arm64is the current 64-bit ARM CPU architecture, as used since the iPhone 5S and later, the iPad Air, Air 2 and Pro, with the A7 and later chips.
i386 and x86_64 are used in Simulators.
Although all architectures are useful in some situations, when submitting an app to the App Store, you can only have arm7, and arm64 architectures. If you encounter the error "ERROR ITMS-90087: Unsupported Architectures" or "Code signing failed", it means that you're trying to submit a binary to the App Store, and that this binary has unsupported architectures inside. You have to remove the unsupported architectures (i386 and x86_64) from the binary you're submitting. There are several approaches which are listed below.
The first approach is to remove them manually. Open Terminal inside the framework directory and run the following commands:
lipo -remove i386 -output DocumentReader.framework/DocumentReader DocumentReader.framework/DocumentReader
lipo -remove x86_64 -output DocumentReader.framework/DocumentReader DocumentReader.framework/DocumentReader
The second approach is to run the embedded script (strip-unused-architectures-from-target.sh).
You can verify that the architectures are removed via lipo:
lipo -info DocumentReader.framework/DocumentReader
How to calculate the final app size?
When you add the Document Reader SDK to your application, you may see that the size of the app has increased a lot. For example, it was 20 MB and then became 170 MB. This may be confusing but please do not rush to conclusions :)
In fact, the size that you are seeing is not the size that your end users will get — the end user's app will occupy significantly less space.
The point is that the size that you can see includes support for four architectures (arm64-v8a, armeabi-v7a, x86, and x86_64) plus the database. Each architecture size is about 25 MB, so they all together take about 100 MB.
But the thing is that one device has one architecture, not four.
See for yourself. Let's find out the size the application will have on the Android device with the arm64-v8a architecture after adding the fullrfid Core and the Full database.
First of all, add the abiFilters option that is used to restrict the set of ABIs.
android {
    buildTypes {
        ndk {
            abiFilters "arm64-v8a"
        }
    }
}
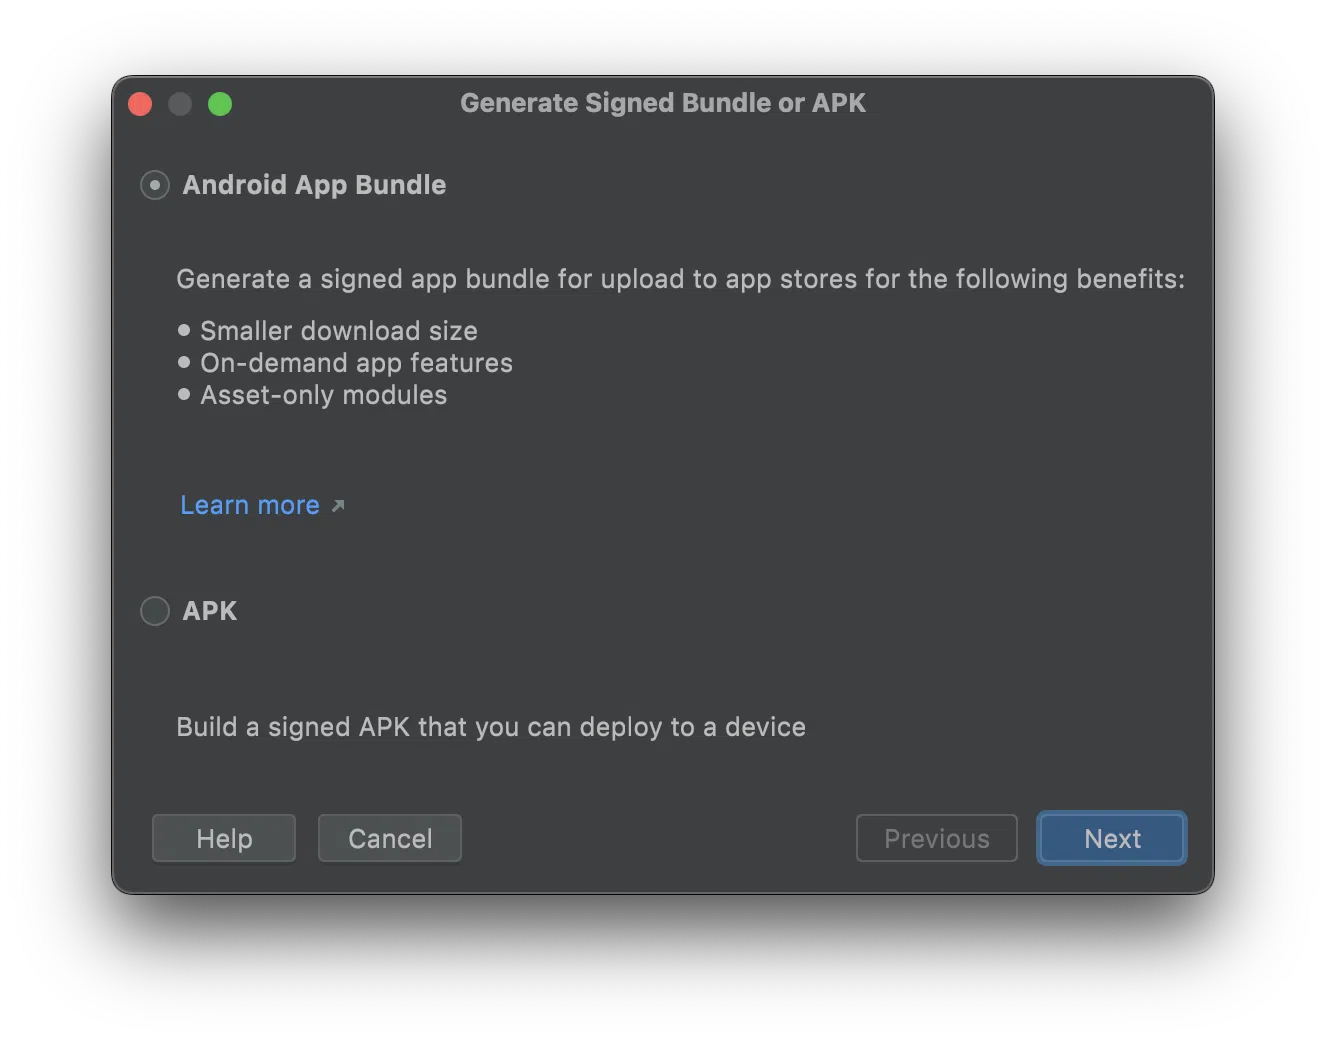
In the Menu of Android Studio: Build -> Generate Signed Bundle / APK. Then choose the Android App Bundle option.
As you can see, the Document Reader SDK will take around 26 MB in the application plus the size of the database. In our case, we've added the Full one with the size around 55 MB. All in all, 26 + 55 = 81 MB.
The most significant part of the Core library takes the libAndroidSdk.so that is presented in the library for each supported architecture (arm64-v8a, armeabi-v7a, x86, and x86_64). The other part, but not significant, takes the resource.dat.
Warning
The numbers above are applicable for the version 6.5.*.
When you add the Document Reader SDK to your application, you may see that the size of the app has increased a lot. For example, it was 20 MB and then became 170 MB. This may be confusing but please do not rush to conclusions :)
In fact, the size that you are seeing is not the size that your end users will get — the end user's app will occupy significantly less space.
The point is that the size that you can see includes support for three architectures (arm64 for iphoneos, arm64 for simulator, x86_64) plus the database. Each architecture size is about 25 MB, so they all together take about 75 MB.
But the thing is that one device has one architecture, not three.
See for yourself. Let's find out the size the application will have on the iOS device with the arm64 architecture after adding the FullRFID Core and the Full database.
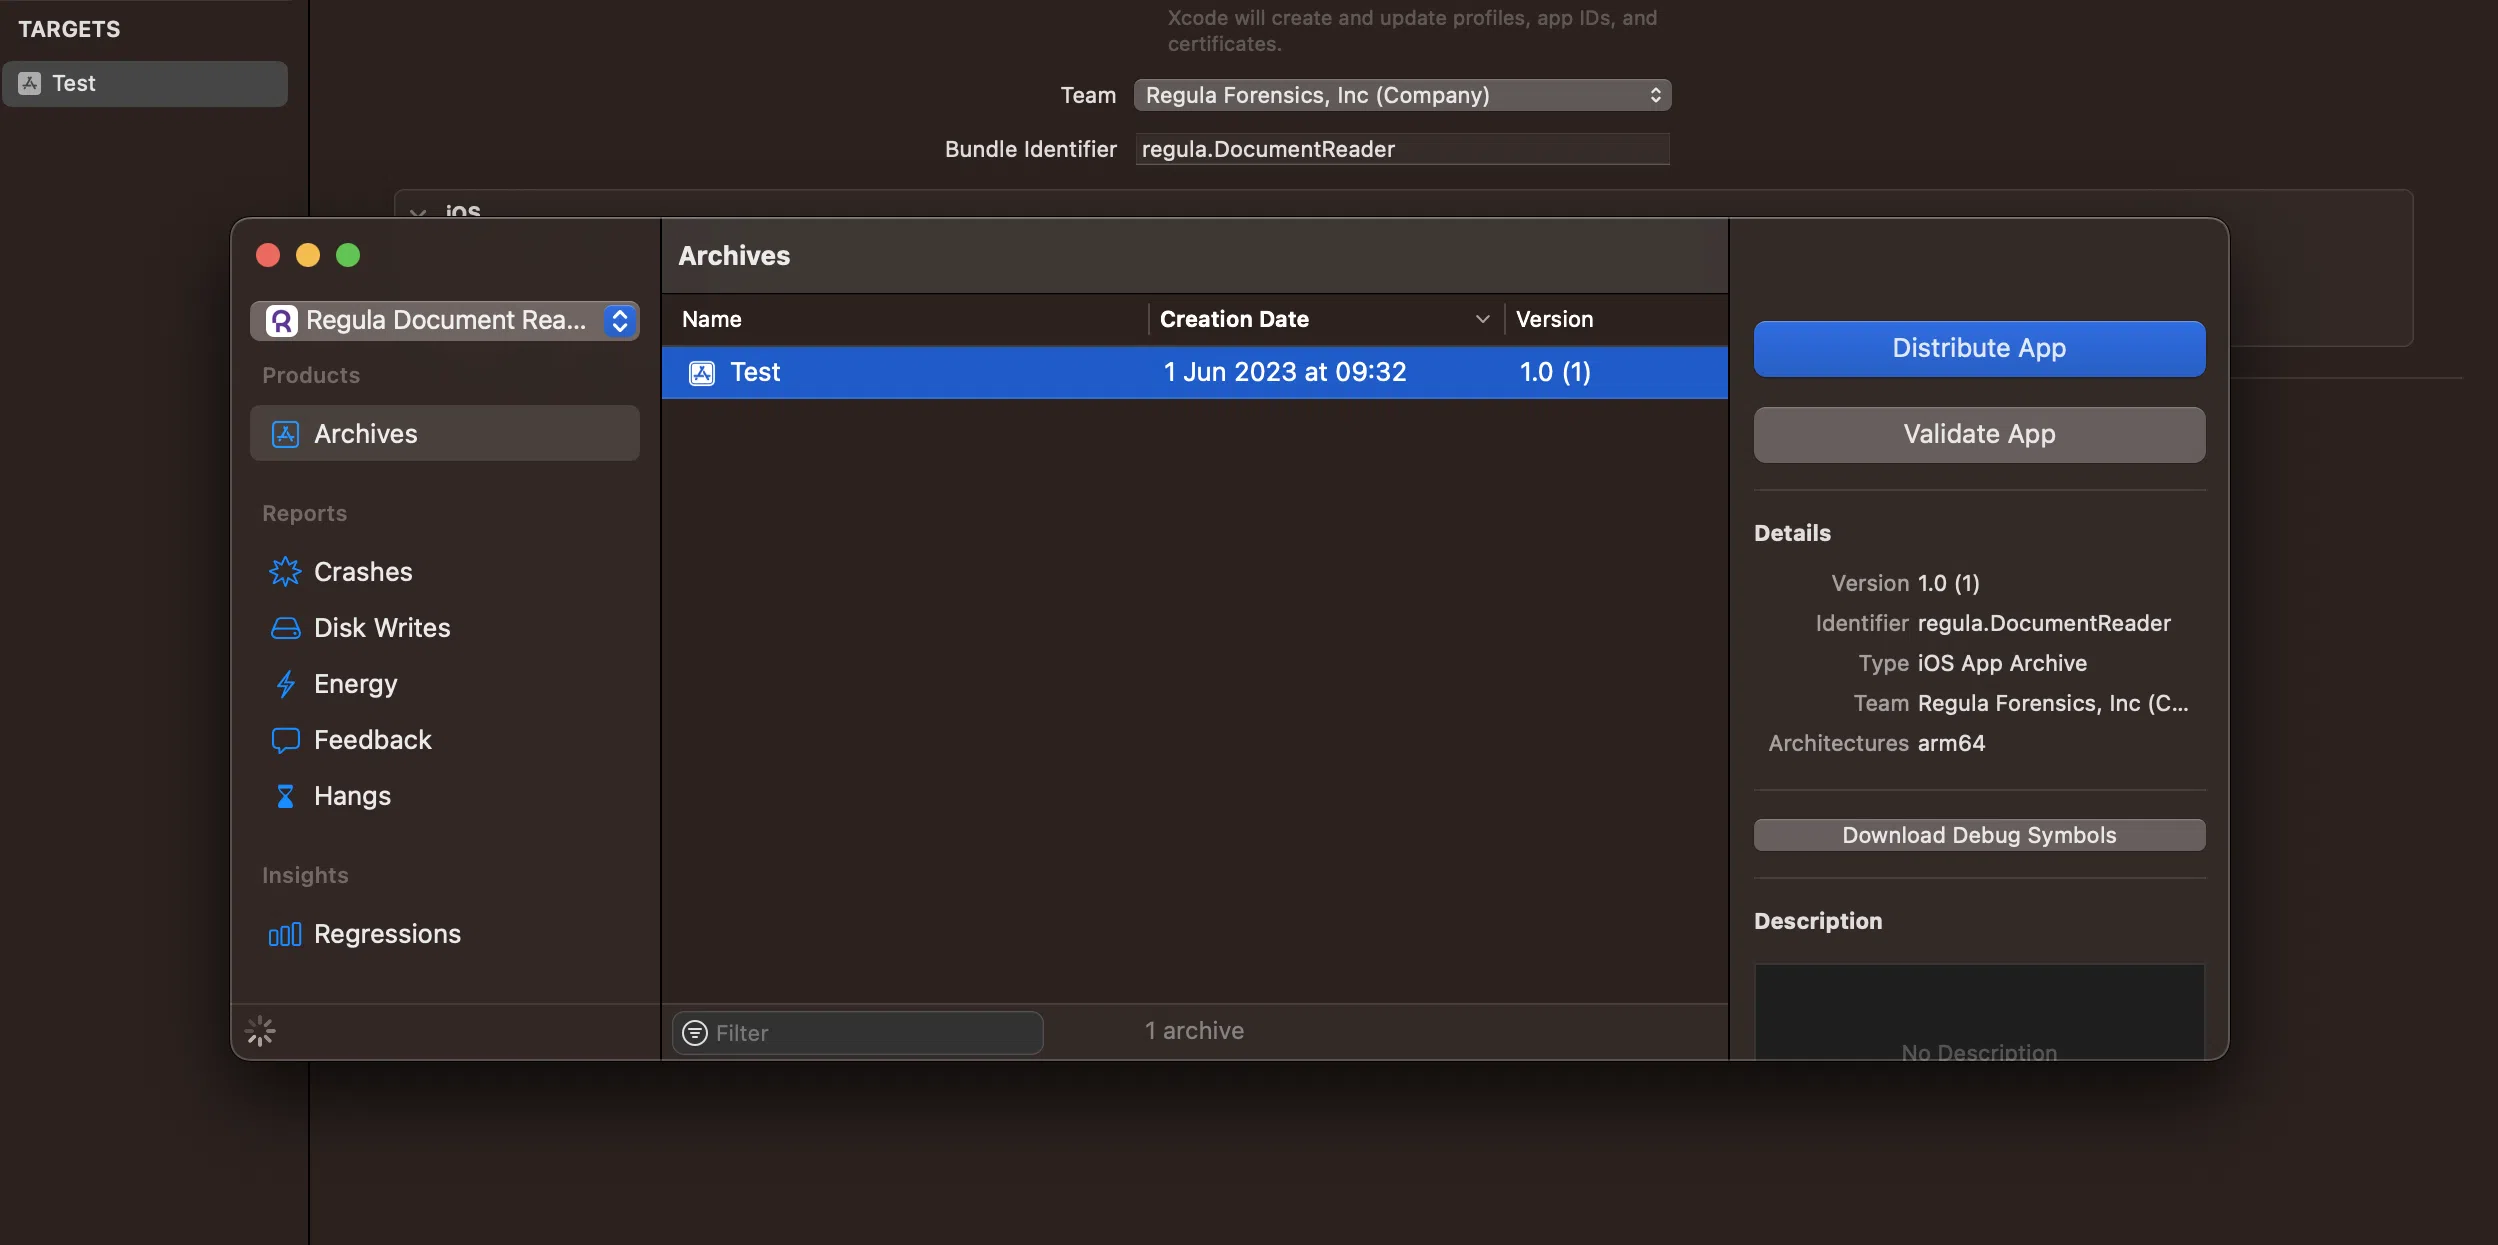
First of all, let's build the project. Then create an archive by clicking the Archive button:

As soon as archive is created, click the Distribute App button:
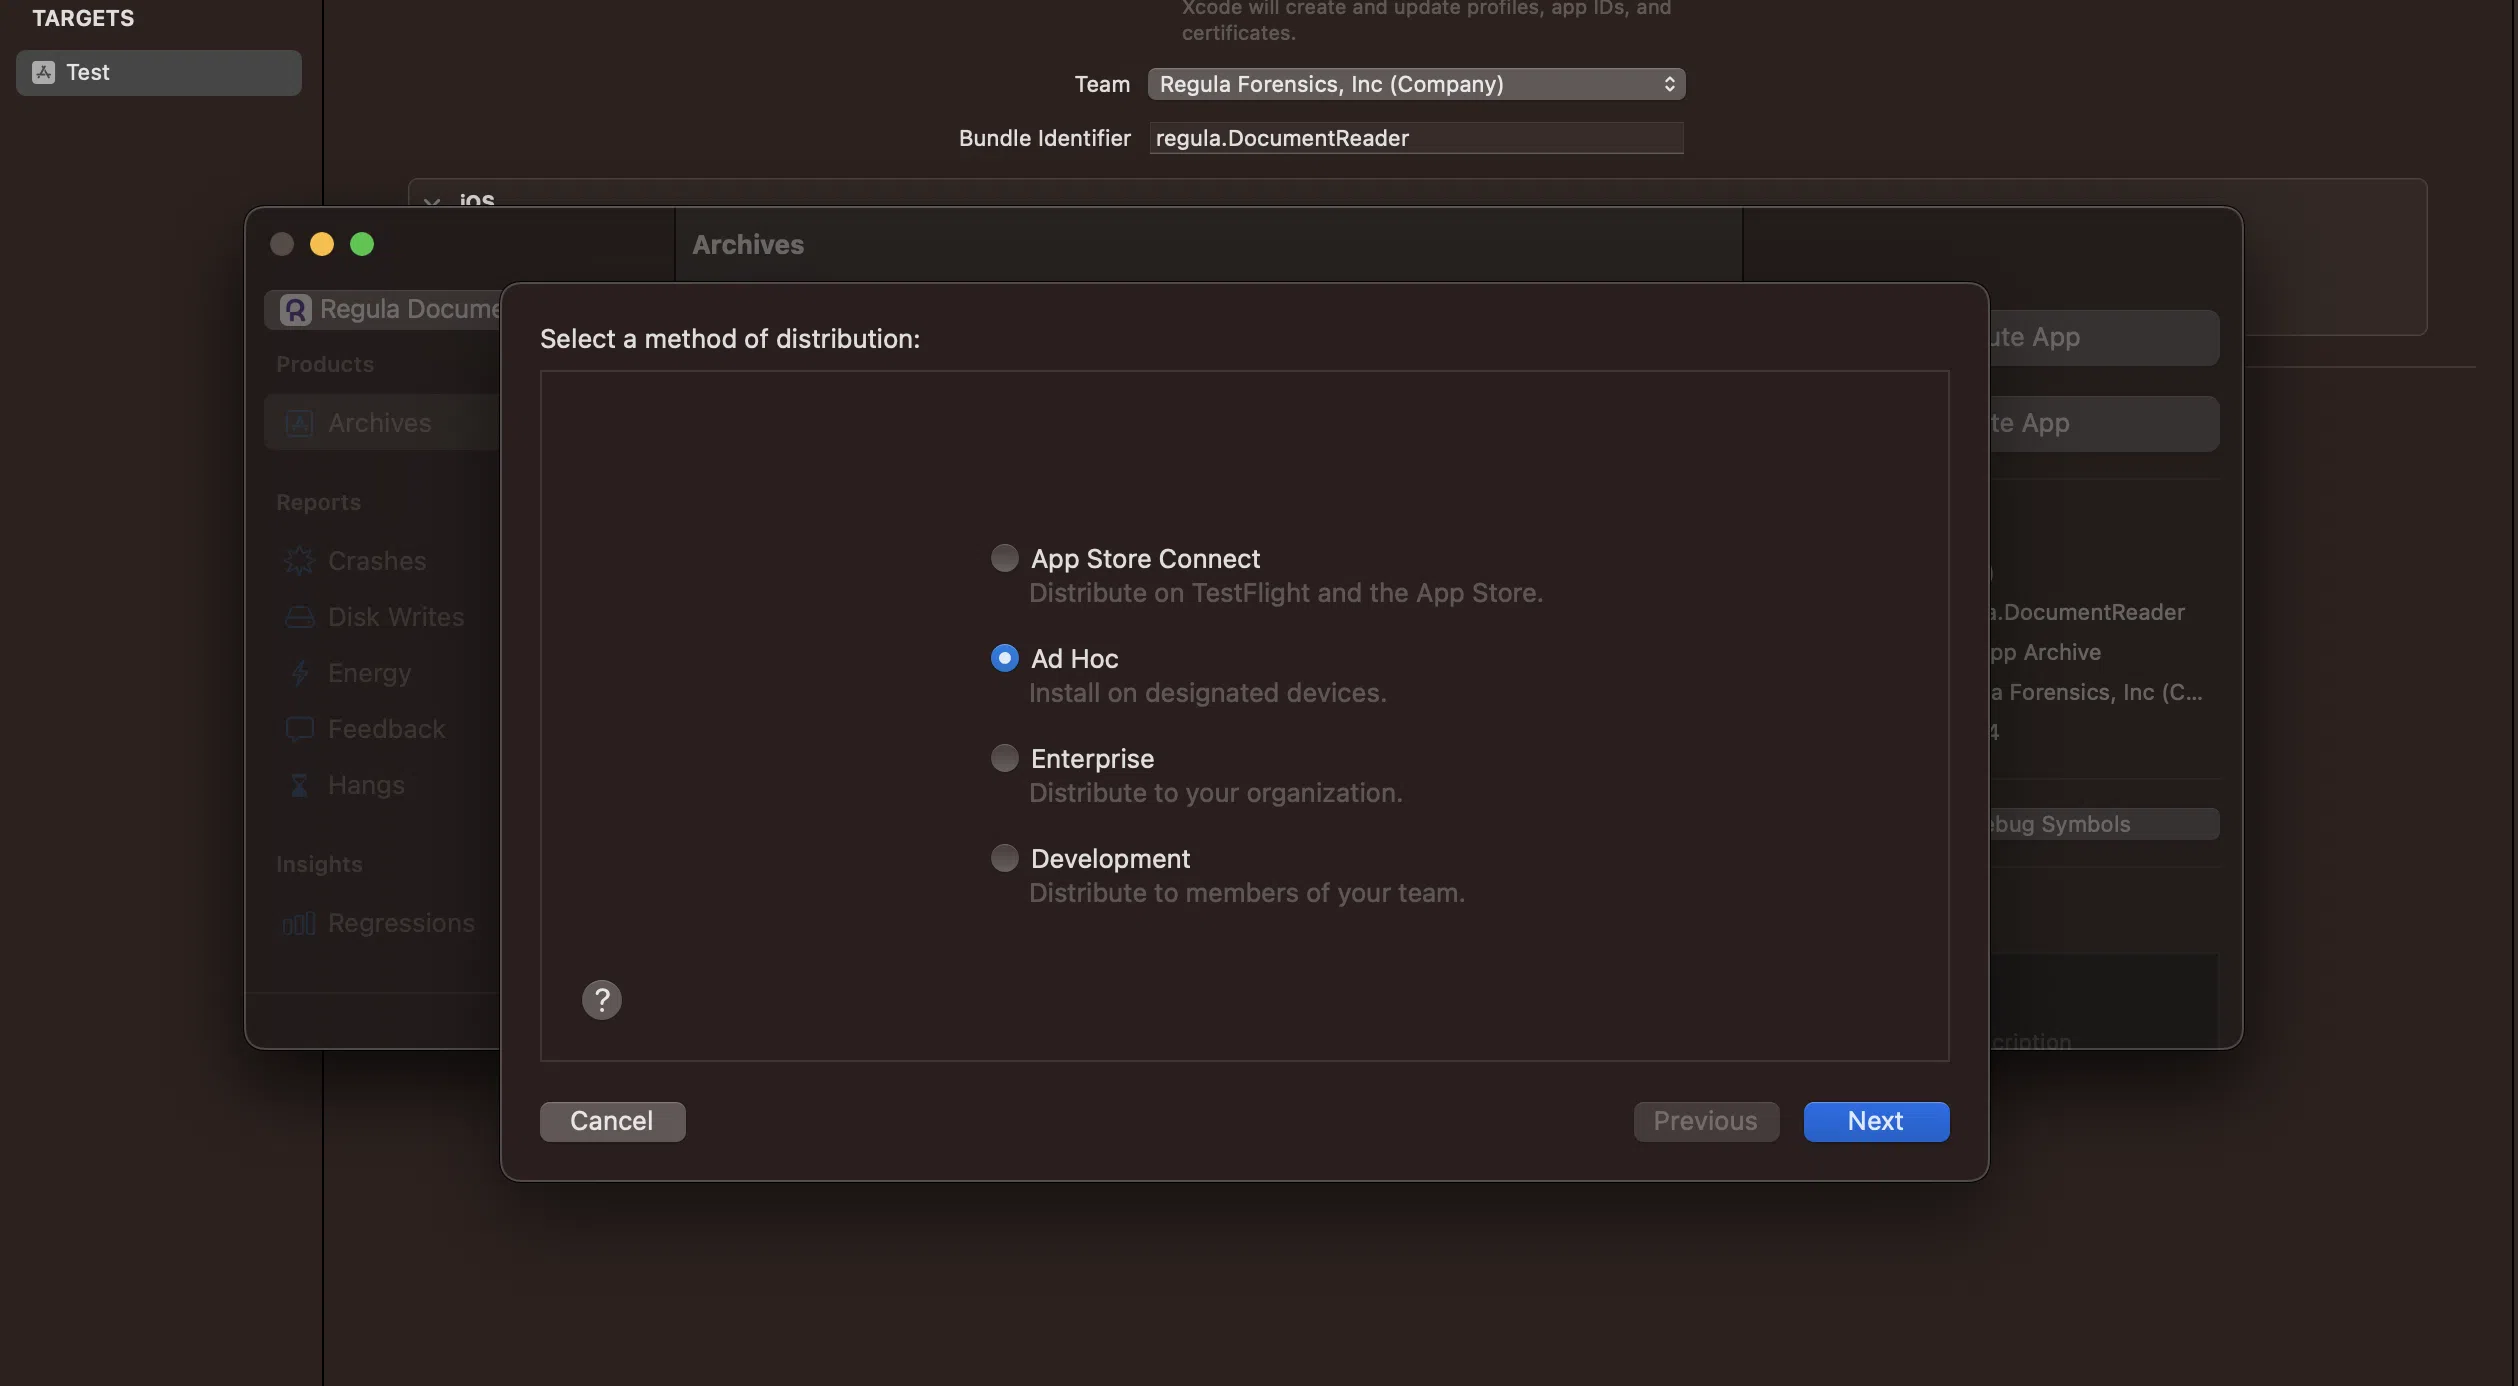
Select Ad Hoc as a method of distribution:
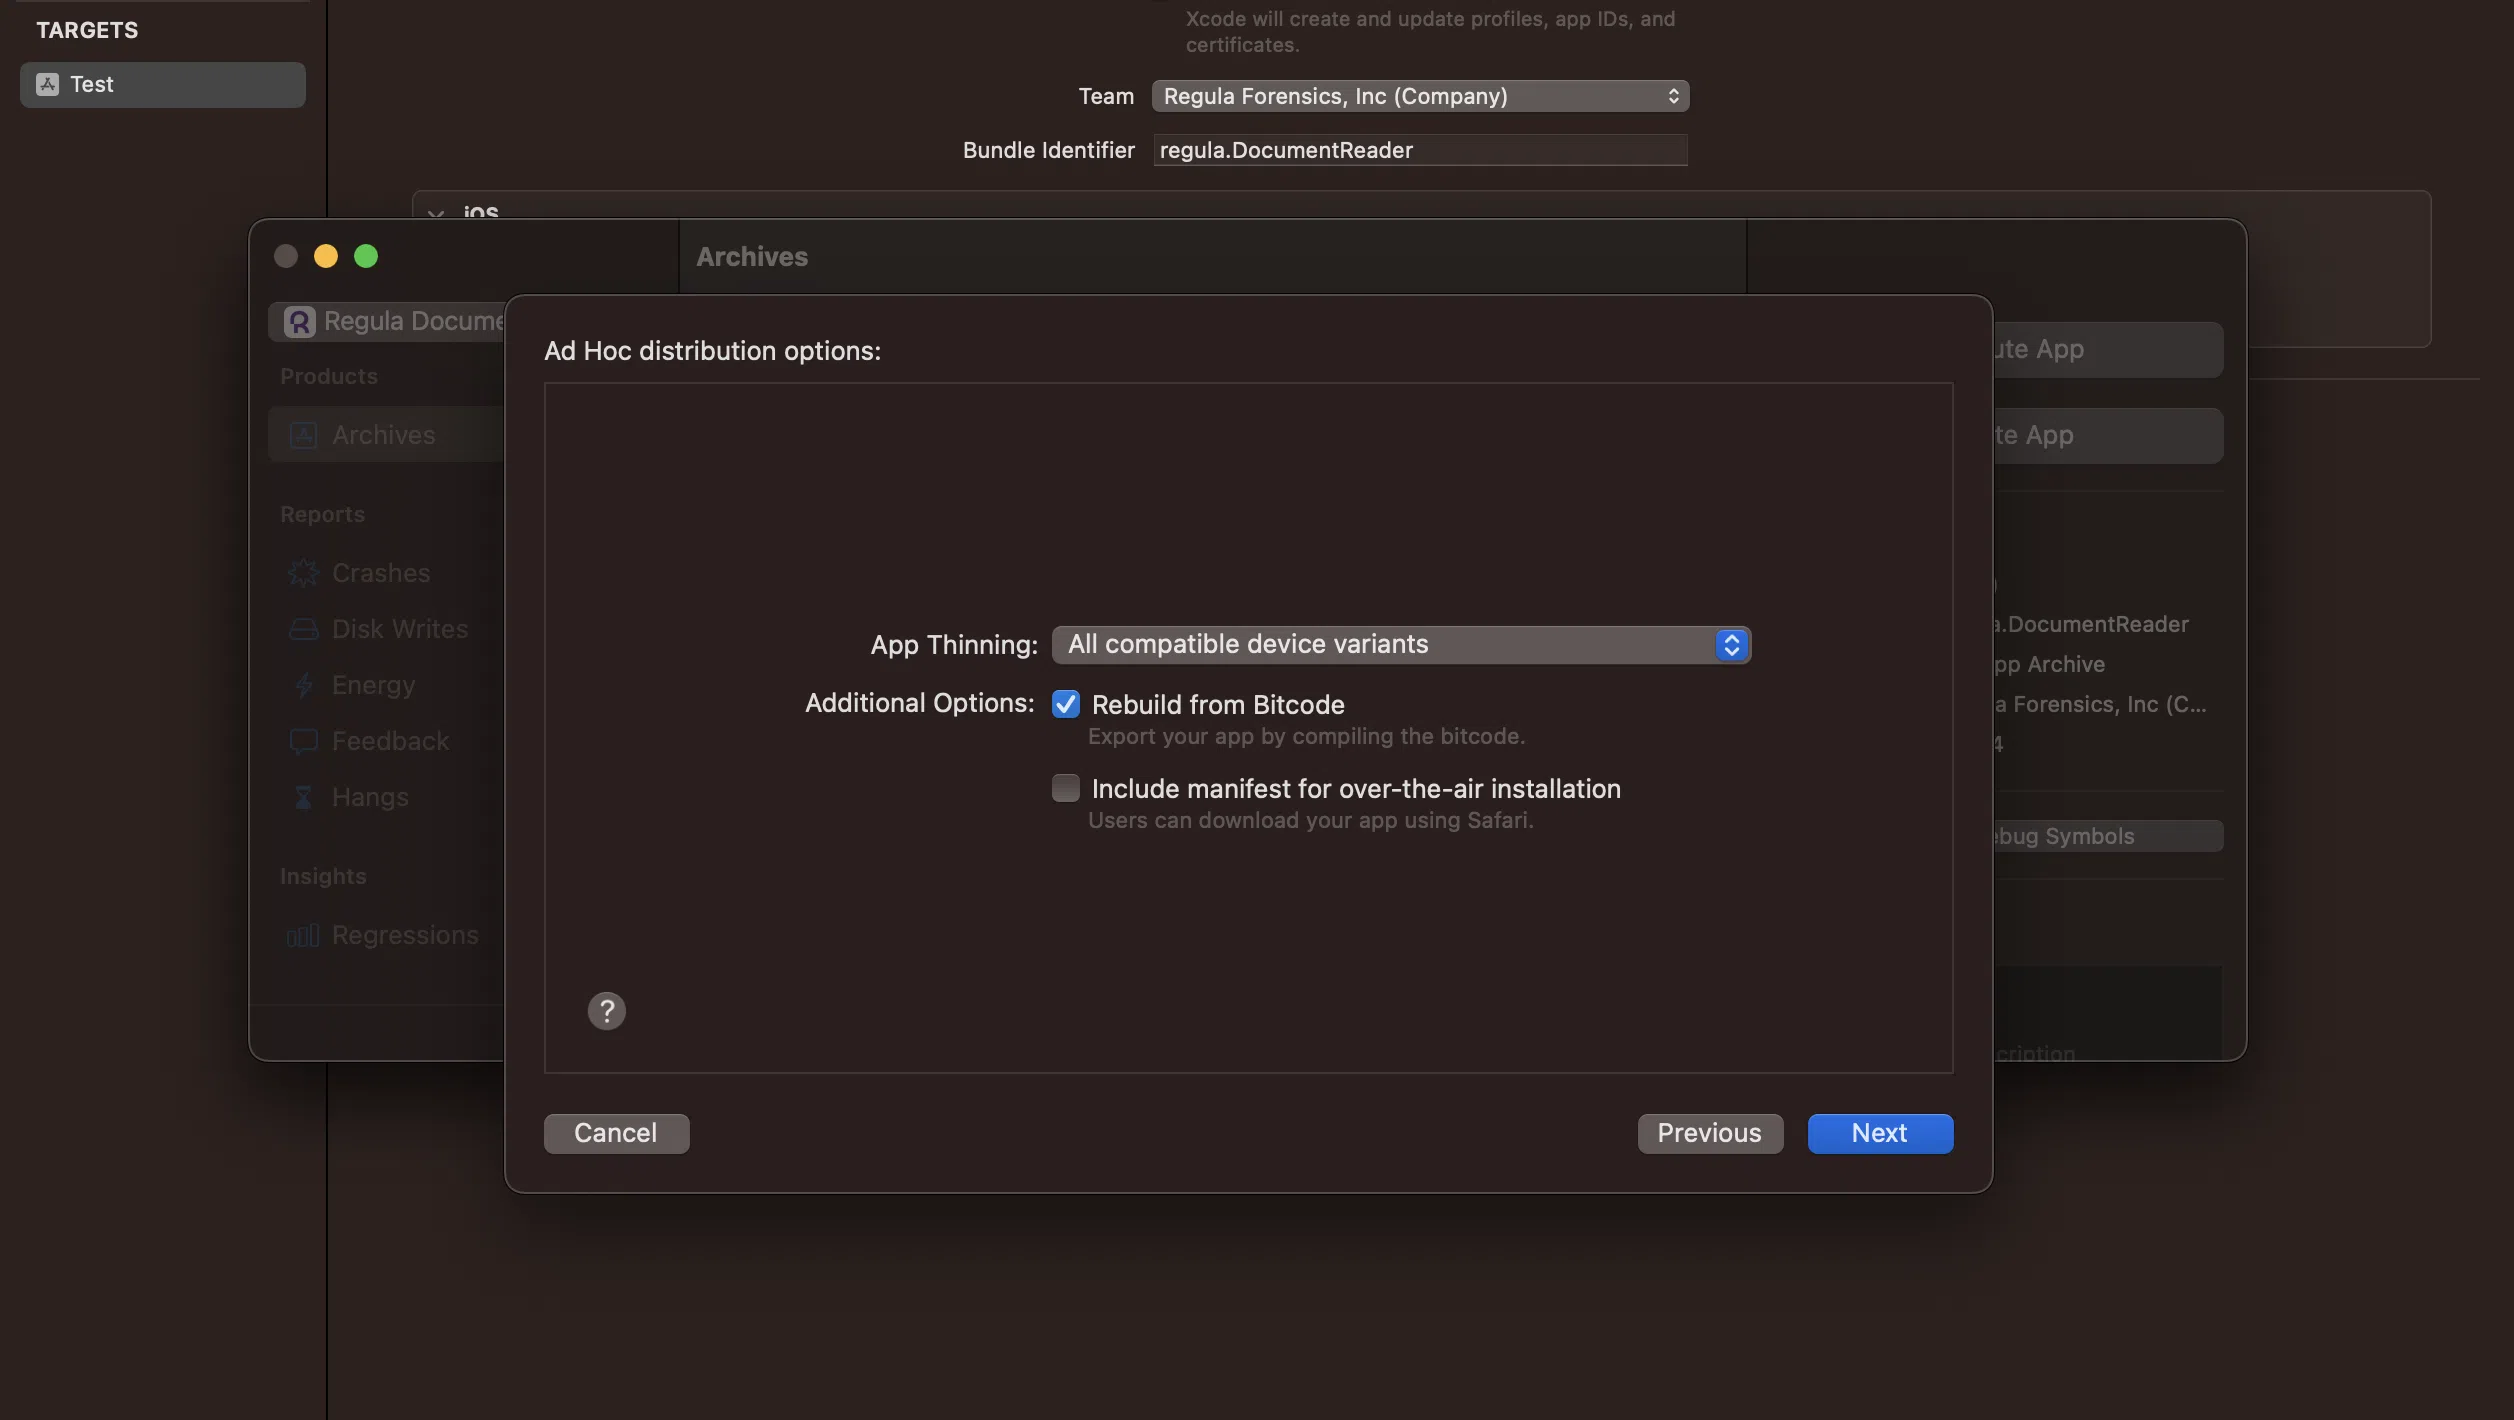
Choose App Thinning and then click Next:
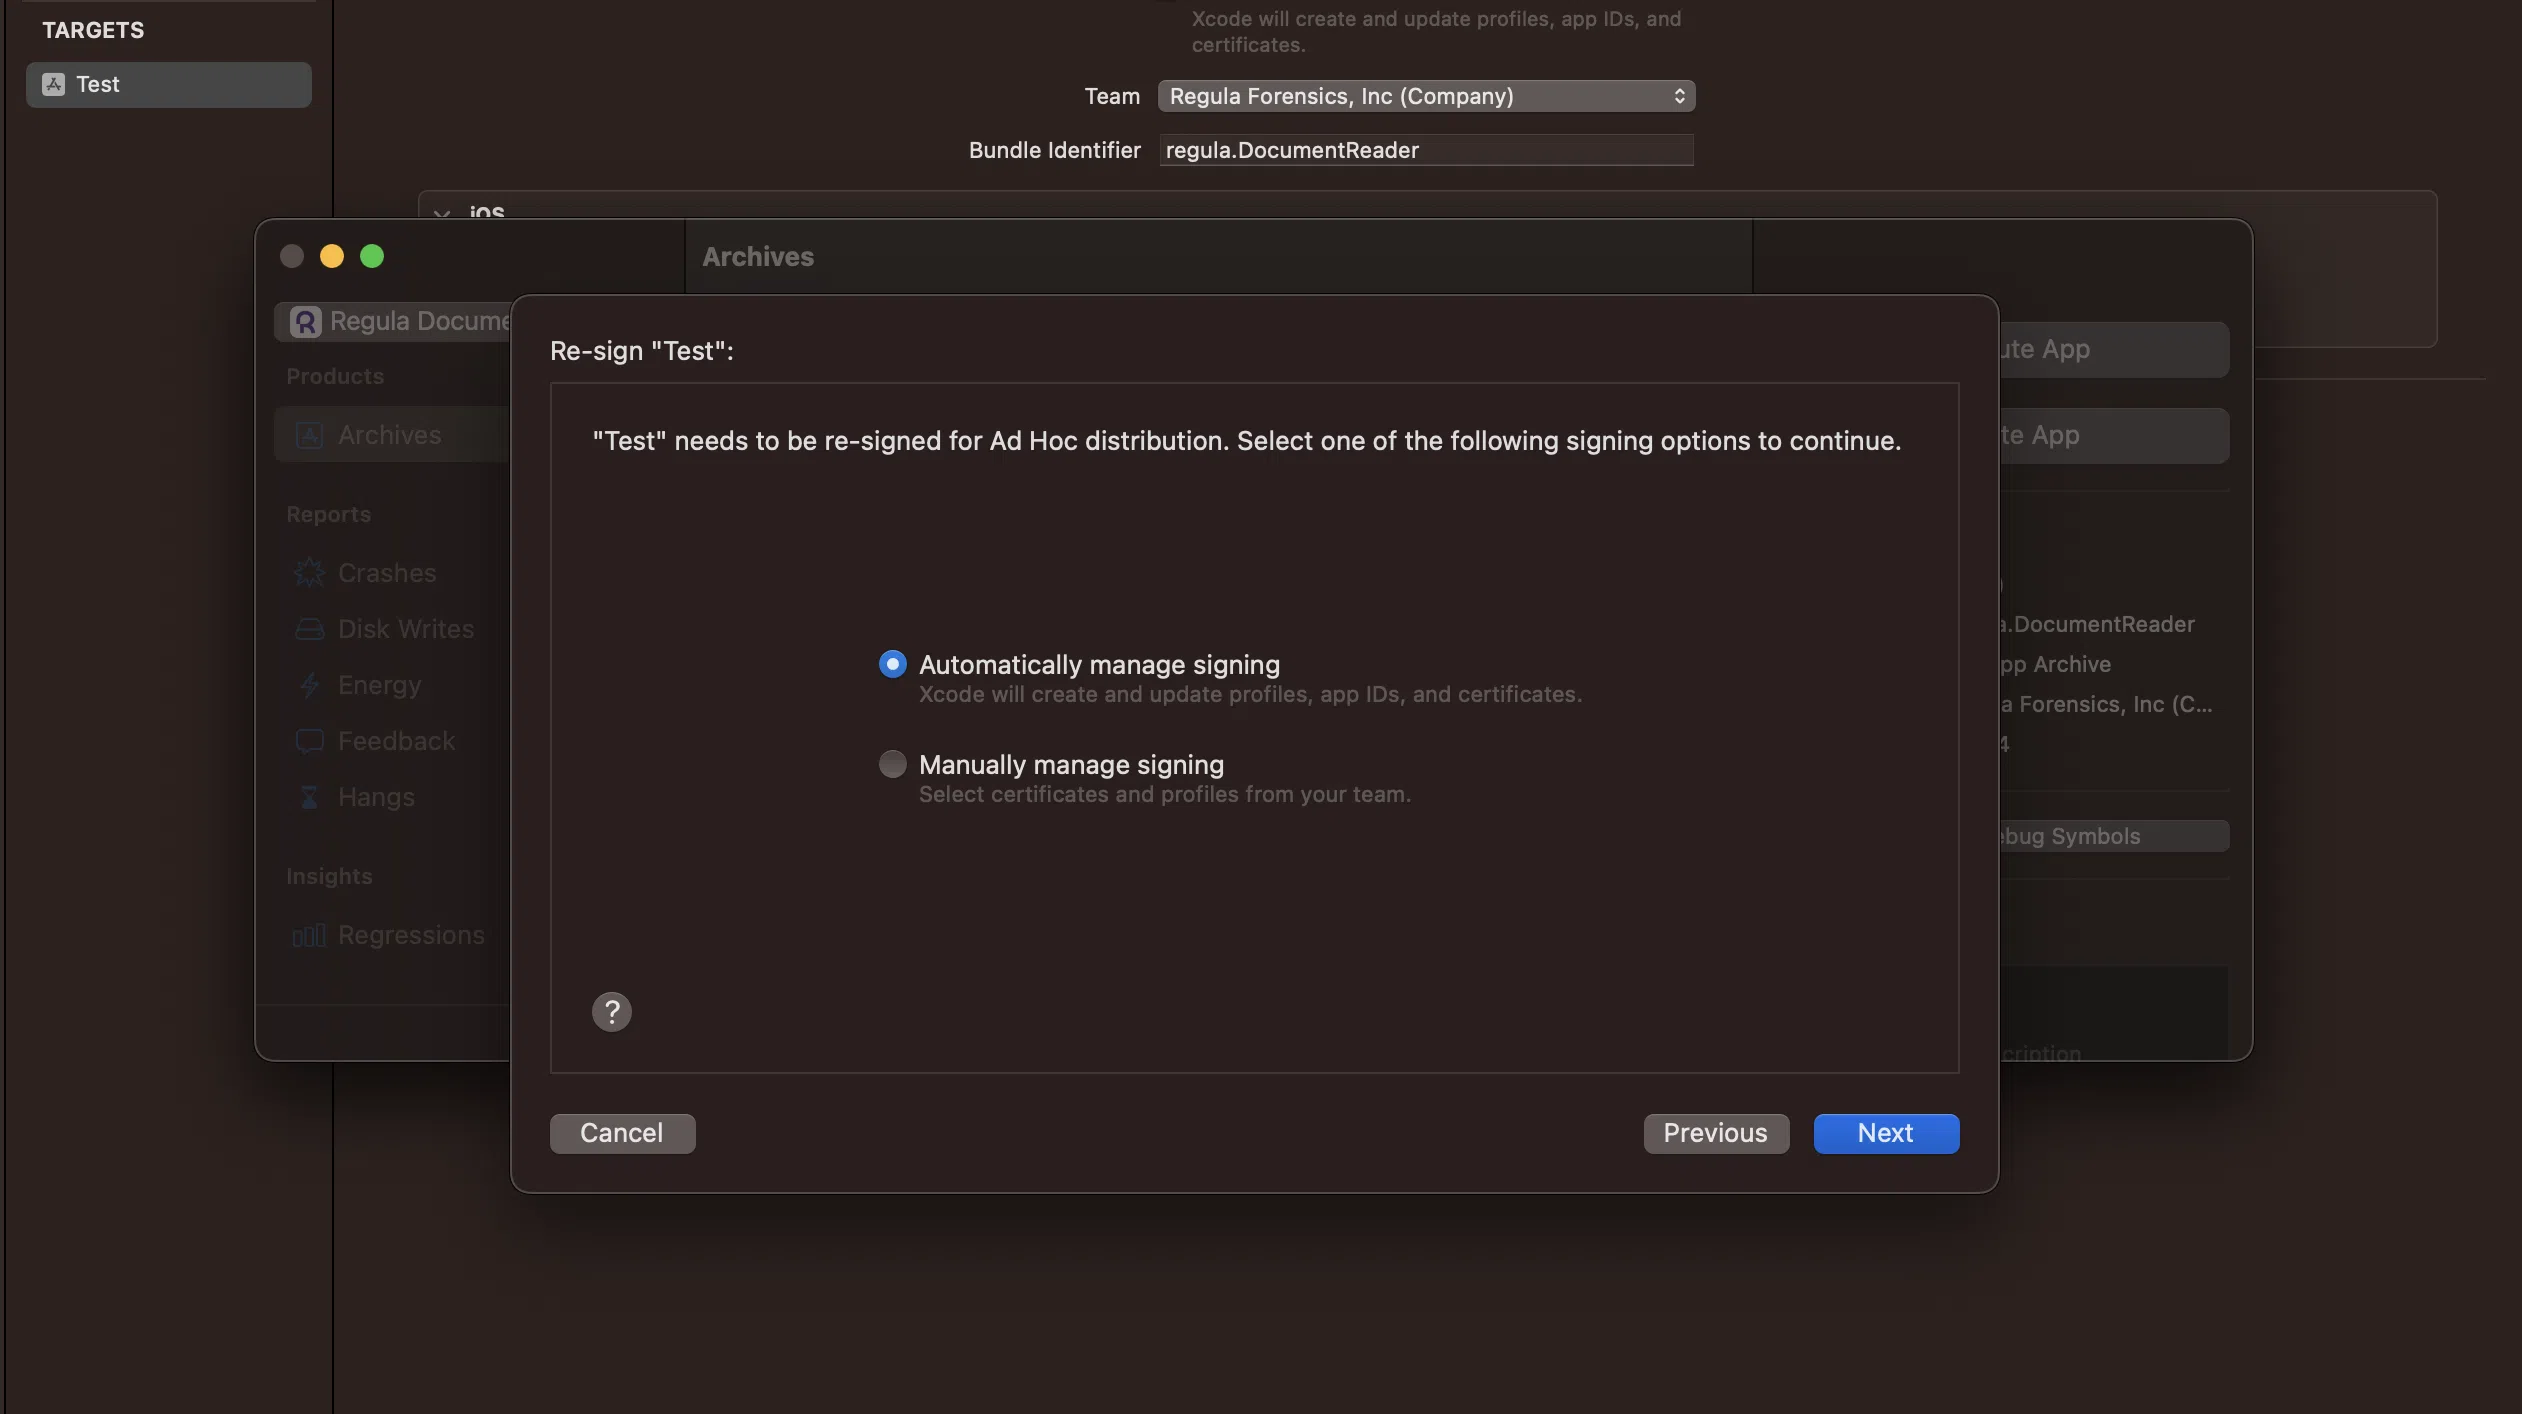
Choose the preferred type of signing. In our case, we use Automatically manage signing:
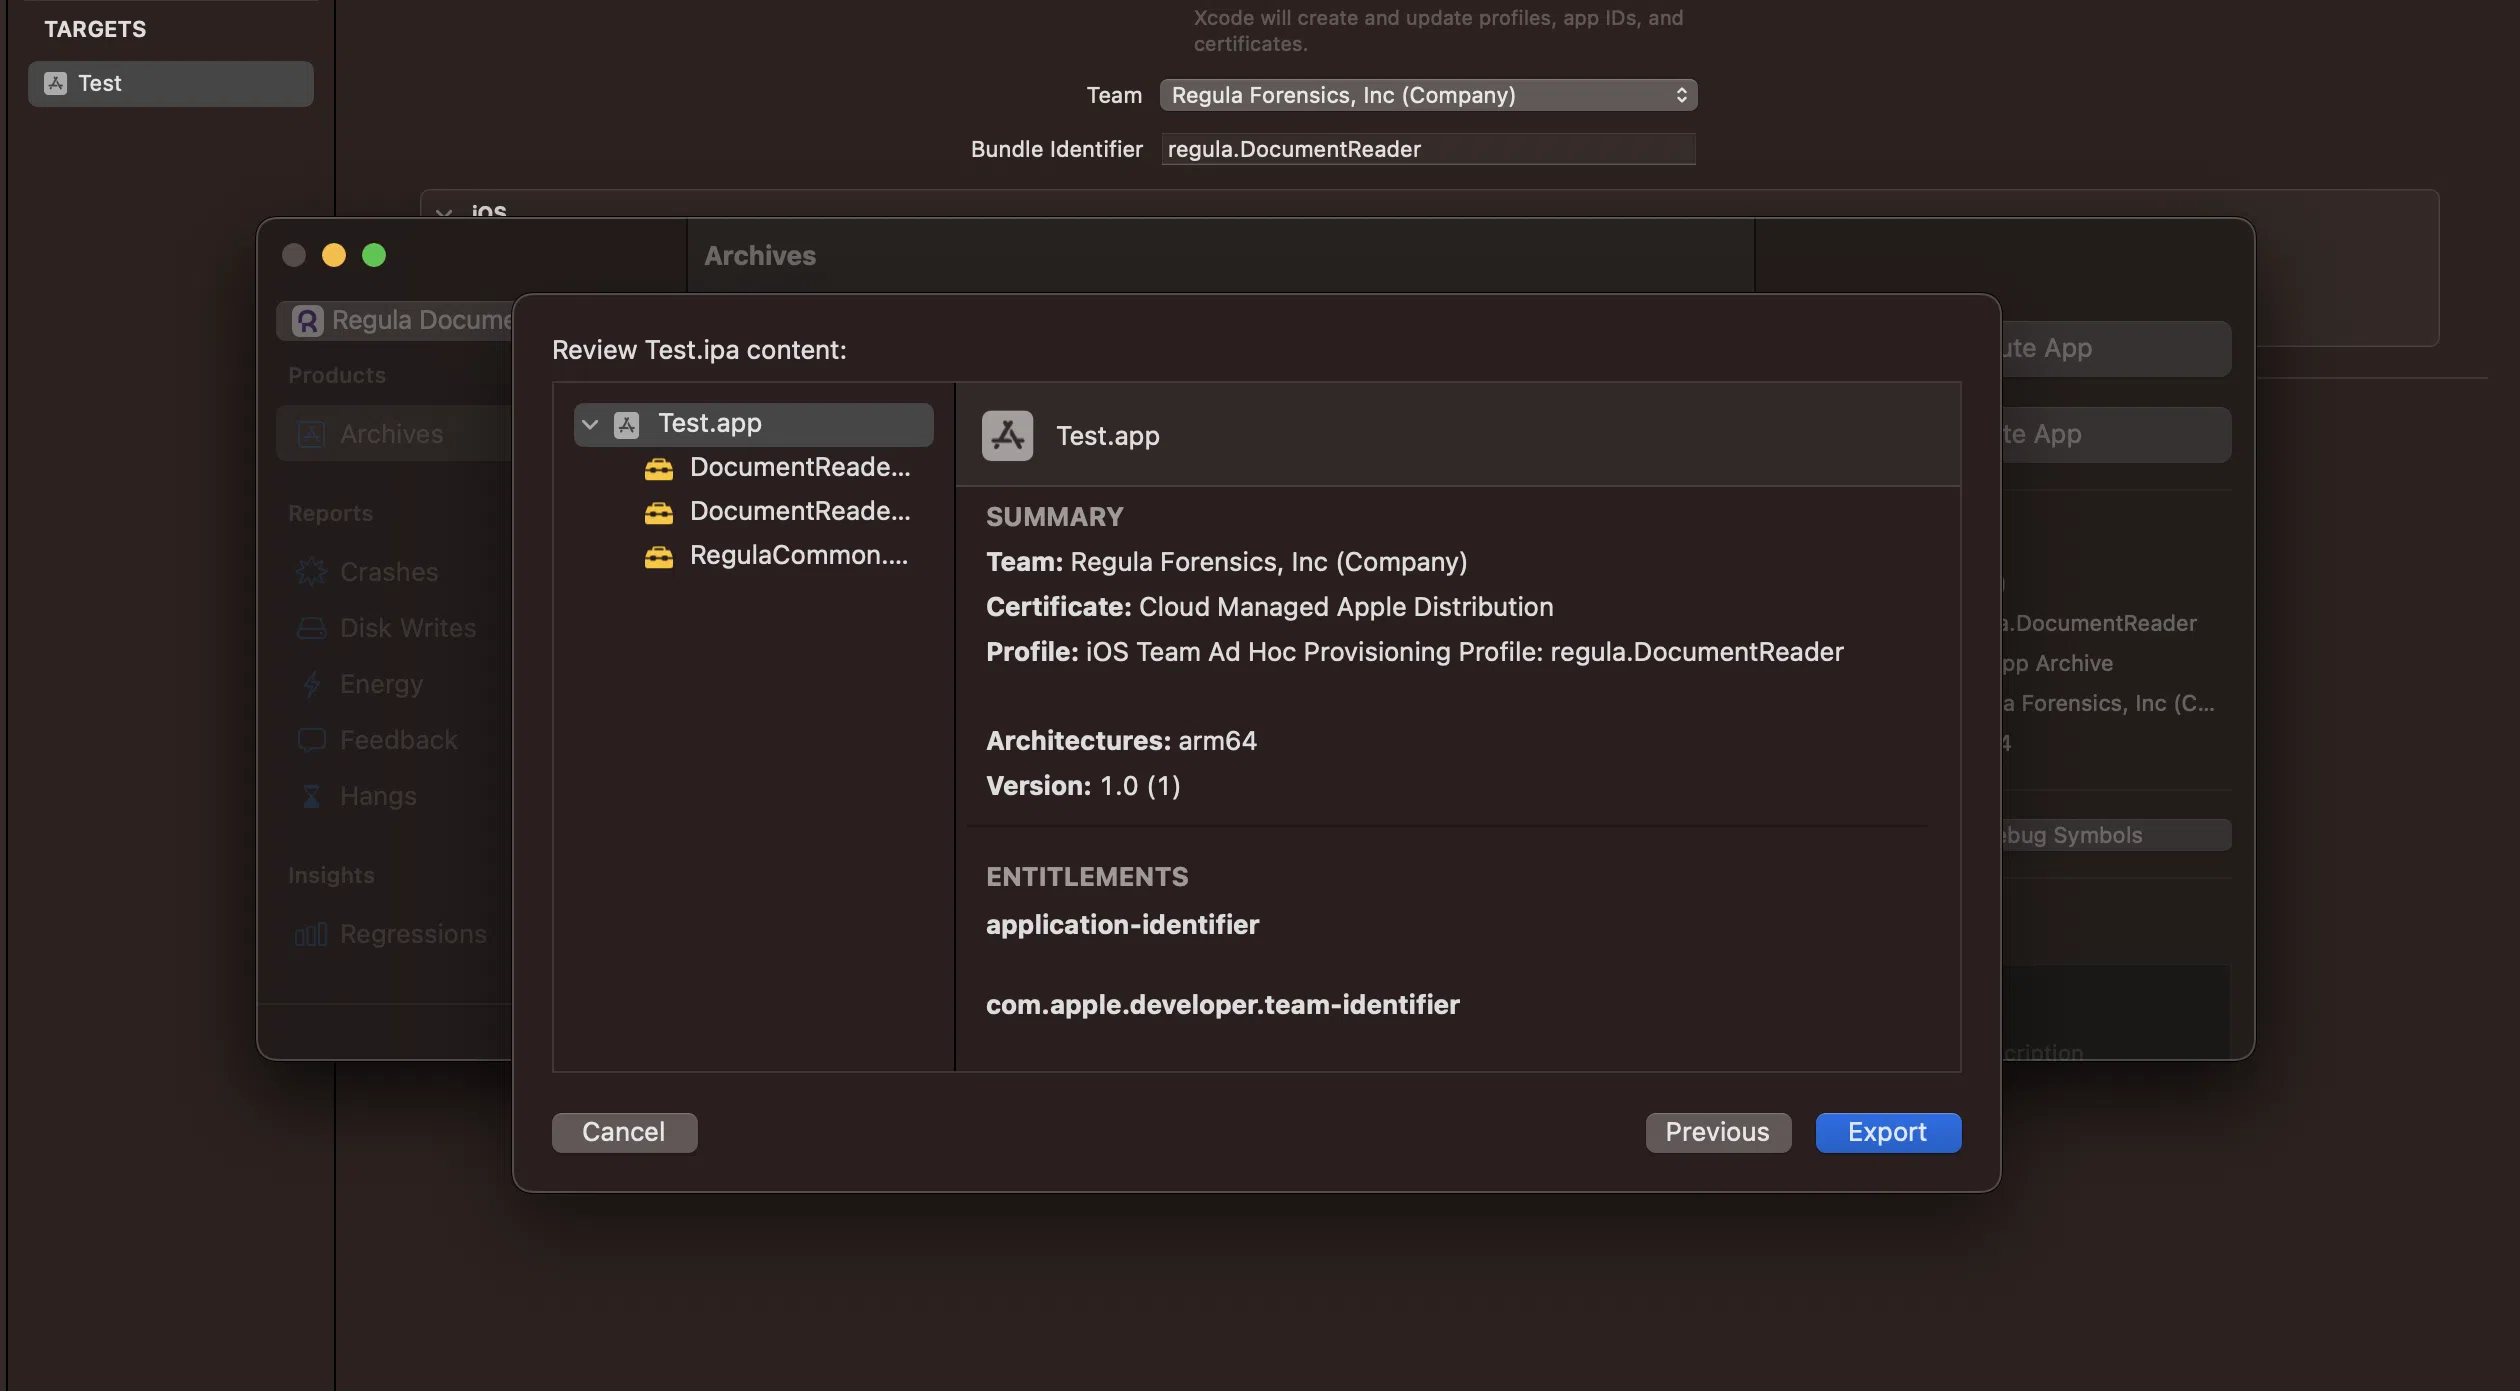
Once all work is done, click the Export button:
As a result, a new folder is created where you can notice the report that shows the app size.
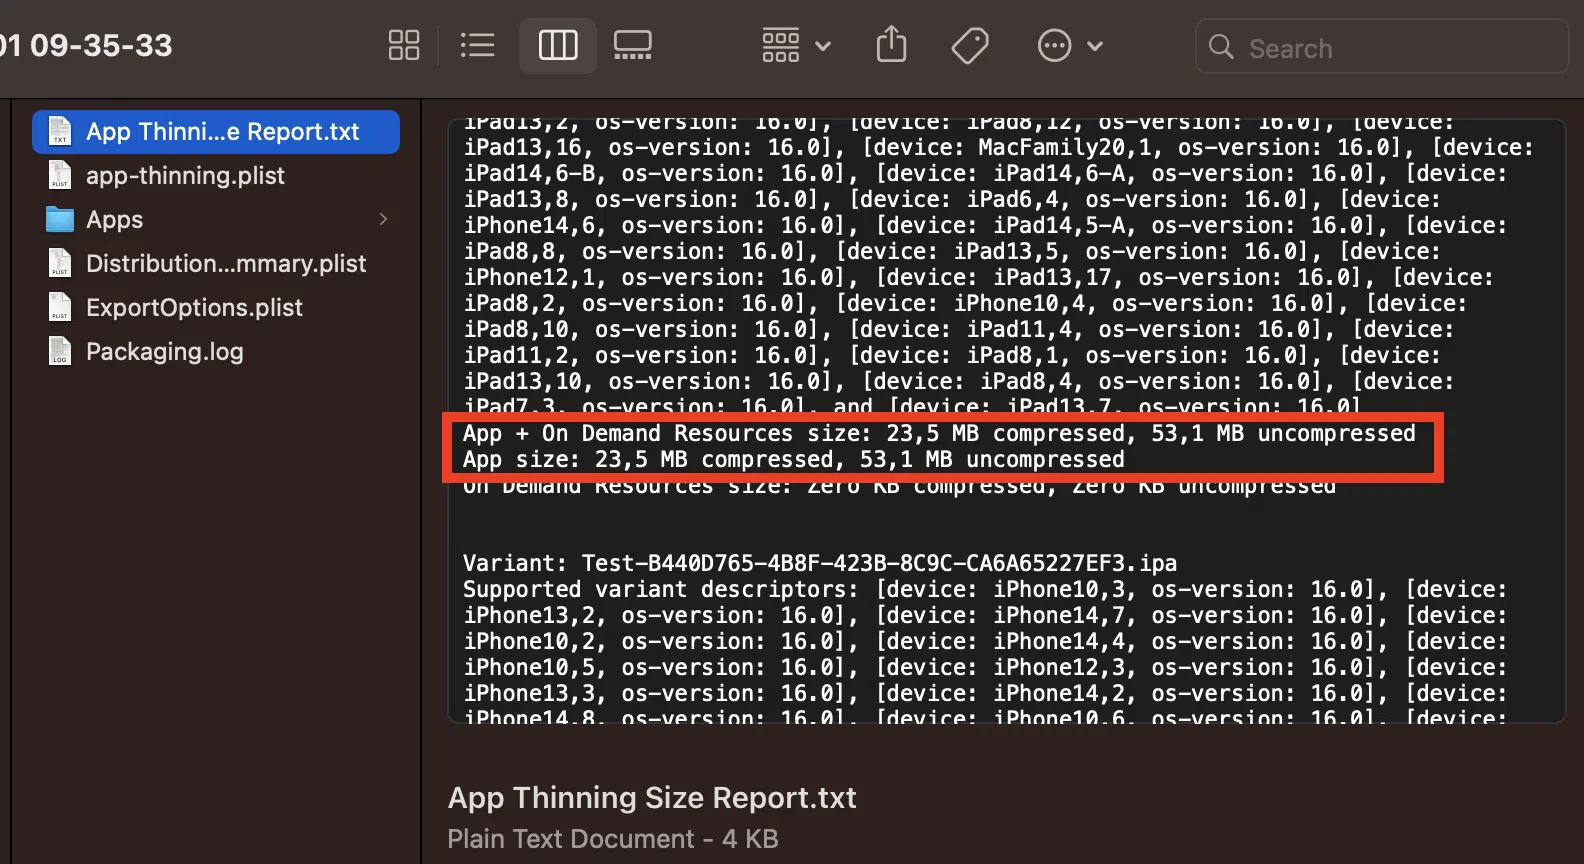
As you can see, the Document Reader SDK will take around 23.5 MB in the application plus the size of the database. If we add the Full one with the size around 55 MB, all in all it will be 23.5 + 55 = 78.5 MB.
The most significant part of the Core library takes the DocumentReaderCore that is presented in the library for each supported architecture (arm64, arm64_x86_64). The other part, but not significant, takes the resource.dat.
Warning
The numbers above are applicable for the version 6.8.*.
App size optimization
To optimize the app size, have a look at the corresponding Optimization section.
What are the bundle ID and application ID?
A bundle ID and application ID have quite the same meaning but a bundle ID is used for an iOS application and an app ID refers to an Android application.
A bundle ID for iOS and an application ID for Android are unique identifiers of an app. They are used by the operating systems and app stores to distinguish between different applications. Both the bundle ID and application ID typically follow a reverse domain name-style format such as "com.example.appname" and are used in various parts of the app's code and configuration files.
How to find out the bundle ID
To find out the bundle ID, you can use Xcode:
- Open your project in Xcode.
- In the "TARGETS" section, select the target for which you want to find the bundle ID.
- In the "General" tab, scroll down to the "Identity" section.
- The bundle identifier for your project will be displayed in the "Bundle Identifier" field.
Note that a bundle ID is case-sensitive.
Find more information about a bundle ID in the official Apple documentation.
How to find out the application ID
In Android development, the application ID is also known as the "package name" and can be found in the build.gradle file of your app module. build.gradle contains the applicationId property. Here are the steps to find it:
- Open the Android Studio and select your app project.
- In the left pane, navigate to the app folder and expand it.
- Open the
build.gradlefile. - Look for the line that starts with
applicationId. - The value after
applicationIdis the application ID for your Android app.
Alternatively, you can check the AndroidManifest.xml file, which is located in the src/main directory of your app. The package attribute in the manifest tag is the Application ID. The merged manifest's package attribute is where the Google Play Store and the Android platform look to identify your app.
For more information, refer to the official Android documentation.
Why does Apple reject my app after integrating Document Reader SDK?
After integrating the Document Reader SDK into your iOS application, your app submission to the App Store may be rejected during Apple’s review process with a reference to App Store Review Guideline 2.1.
This issue occurs because Document Reader SDK includes Apple’s Core NFC framework, which is used for reading RFID chips. During the review, Apple may detect the NFC-related capabilities and request a video demonstration showing how your app uses NFC.
If your app does not use RFID chip reading and you have not included NFC permissions or capabilities in your project, inform Apple that NFC features are not used in your app. The presence of Core NFC in third-party dependencies such as Document Reader SDK can trigger this request even if NFC is not actually used by the end application.
If your app does incorporate RFID chip processing, you need to record a video demonstration showing how your app uses NFC and submit it to Apple for review. In addition, include a written explanation detailing how NFC functionality is utilized in your app.