Cordova
On Cordova, the way of localizing textual strings differs for Latin alphabet-based languages and all the other alphabets.
Latin Alphabet
To change the existing localization for Latin alphabet-based languages, you can use the setLocalizationDictionary function provided by the Face SDK. This will remap any string found in the native API.
To see all the localization keys, look up the FaceSDK.strings file at platforms/ios/Pods/FaceSDK/FaceSDK.xcframework/ios-arm64/FaceSDK.framework/FaceSDK.bundle/en.lproj/FaceSDK.strings.
Here is an example of how you can override any existing localization provided by the Face SDK:
FaceSDK.setLocalizationDictionary({
  "livenessGuide.head": "My first custom string",
  "livenessGuide.button": "My second custom string"
}, function (s) { }, function (e) { })
Other Alphabets
Due to Cordova limitations, the described above setLocalizationDictionary function works only for the Latin alphabet. If you need to add text strings in any other alphabets (Cyrillic, Arabic, Chinese, Devanagari, Bengali, etc.), use the method below.
1. Create a Localizable.strings file and add text strings in your language. You can find all the localization keys in the FaceSDK.strings file at platforms/ios/Pods/FaceSDK/FaceSDK.xcframework/ios-arm64/FaceSDK.framework/FaceSDK.bundle/en.lproj/FaceSDK.strings.
2. Start Xcode.
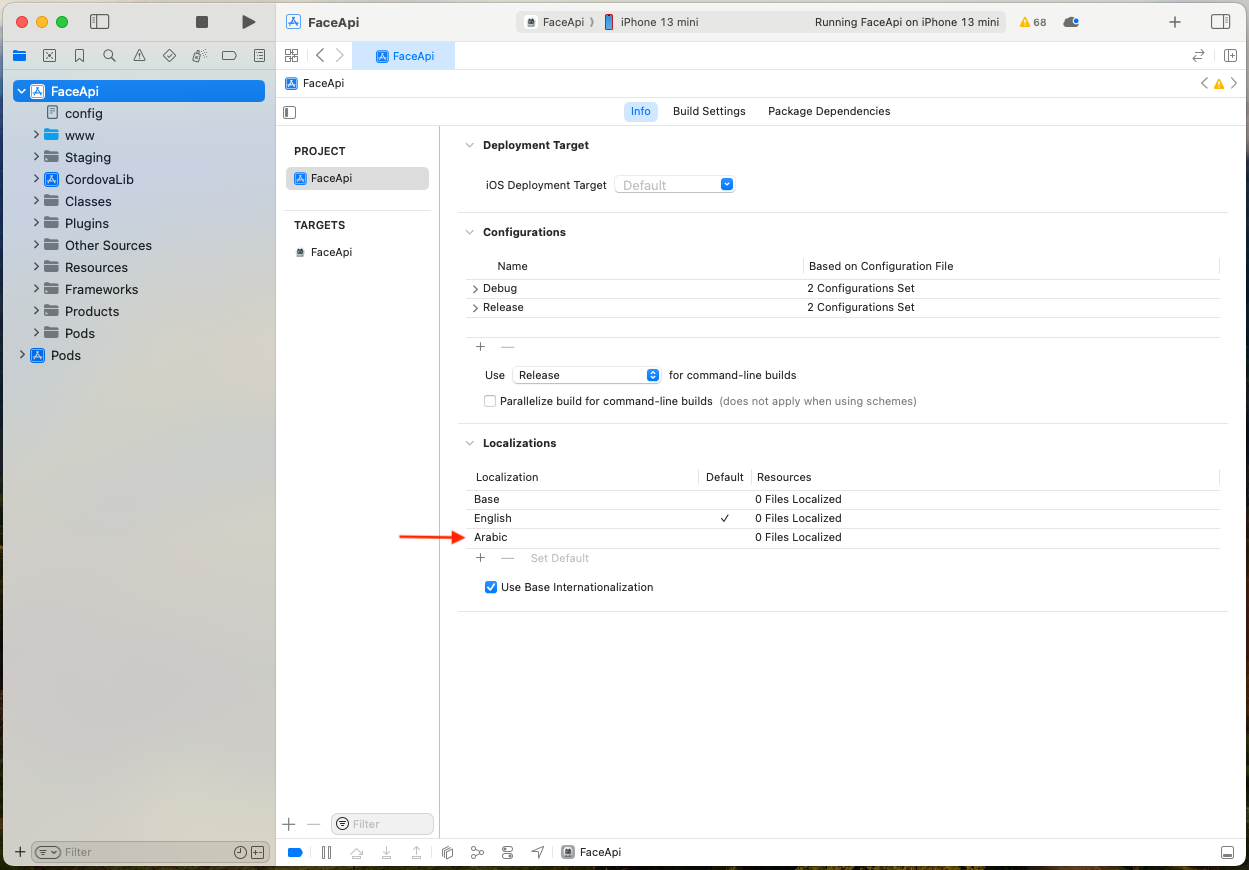
3. Add the required localization to your project. For this, in the project editor, select the project name and click Info. In the Localizations section, click Add (+) and select a language from the pop-up menu:

The added localization will appear in the list:
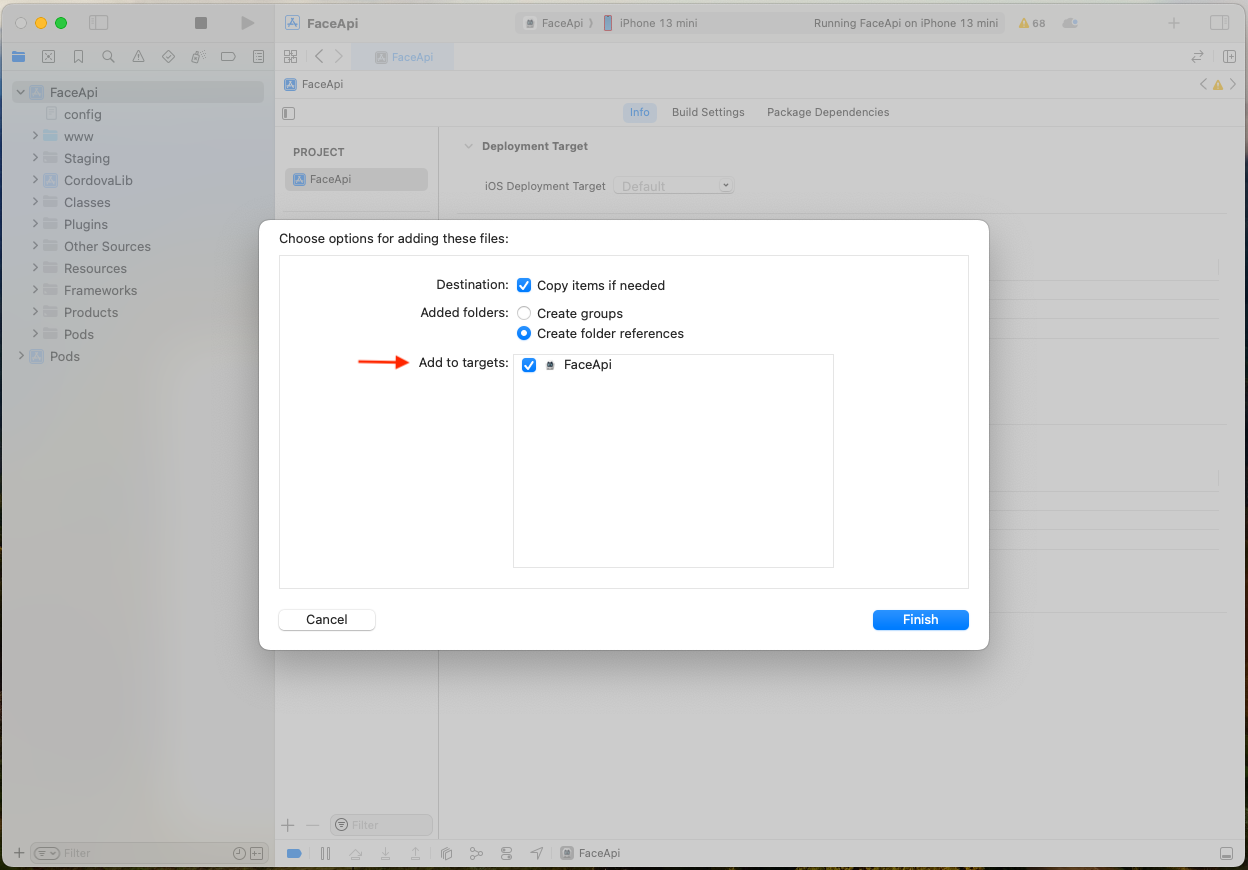
4. Drag the Localizable.strings file to the root folder of the project, select the Add to targets checkbox, and click Finish:
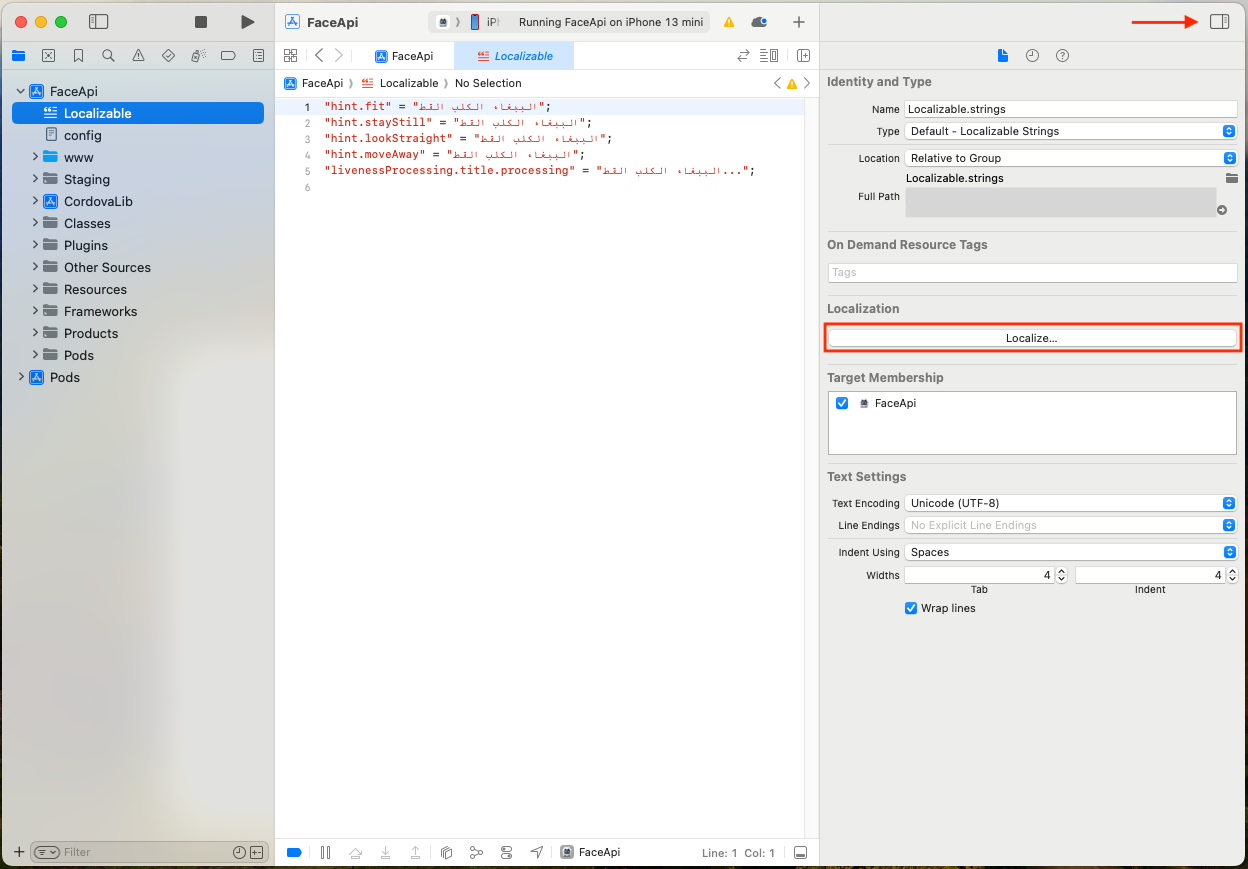
5. Select the Localizable.strings file, expand the menu on the right, and click Localize:
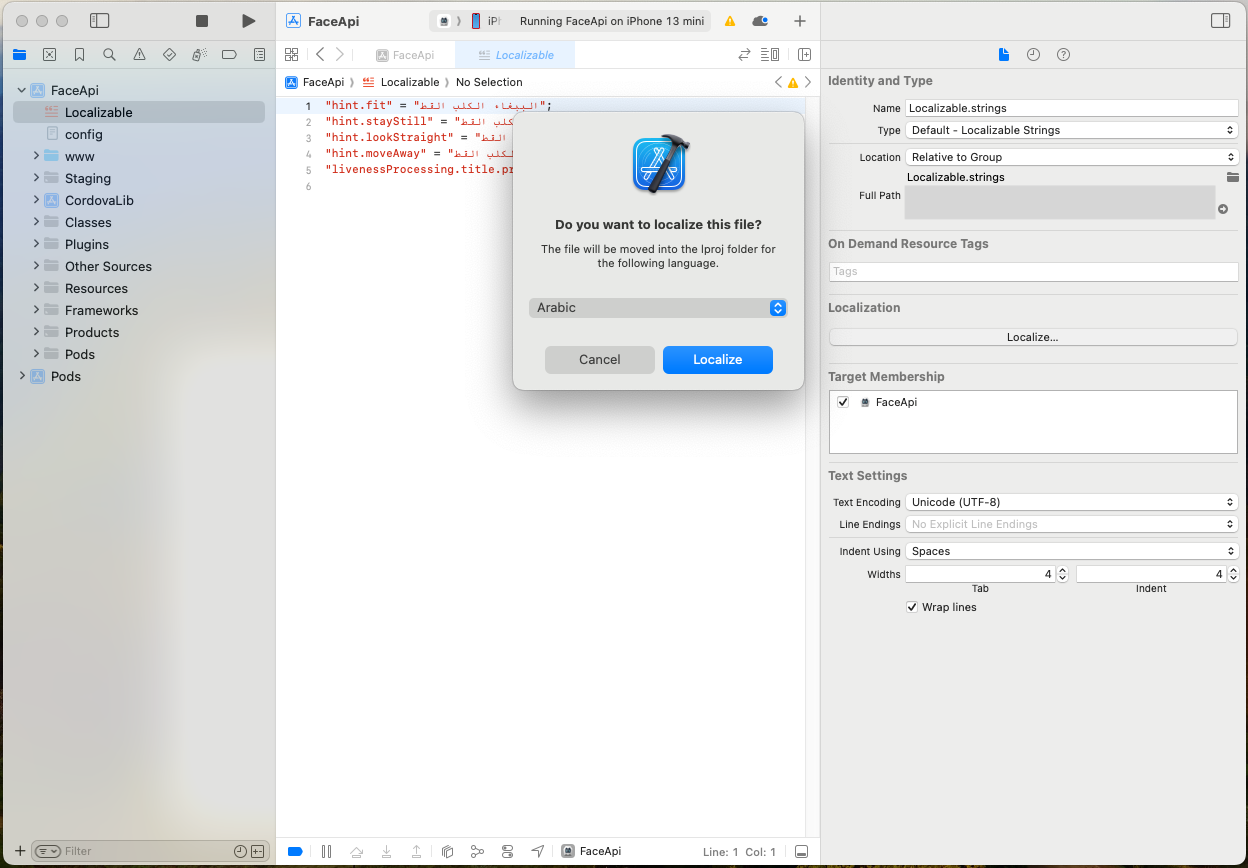
6. In the dialog box, pick the language and click the Localize button:
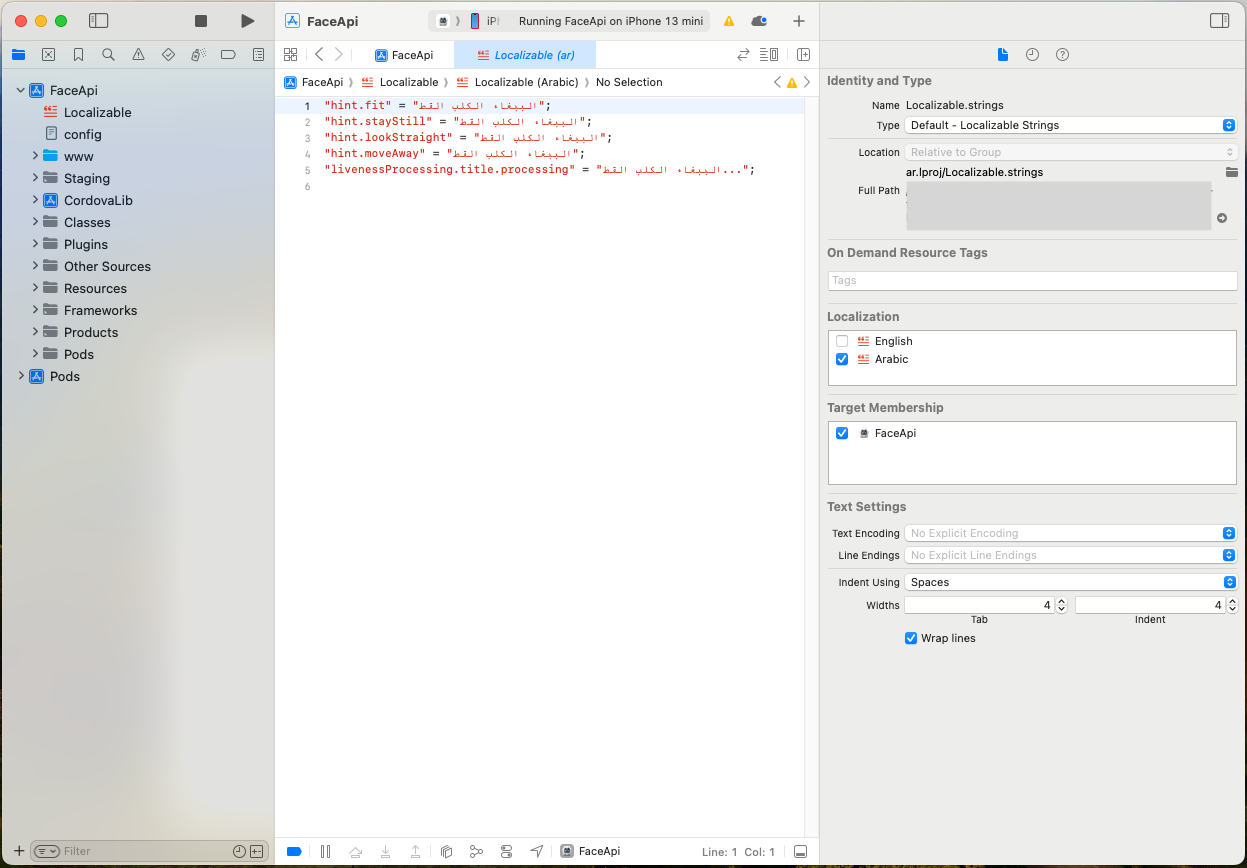
7. The localization is added:
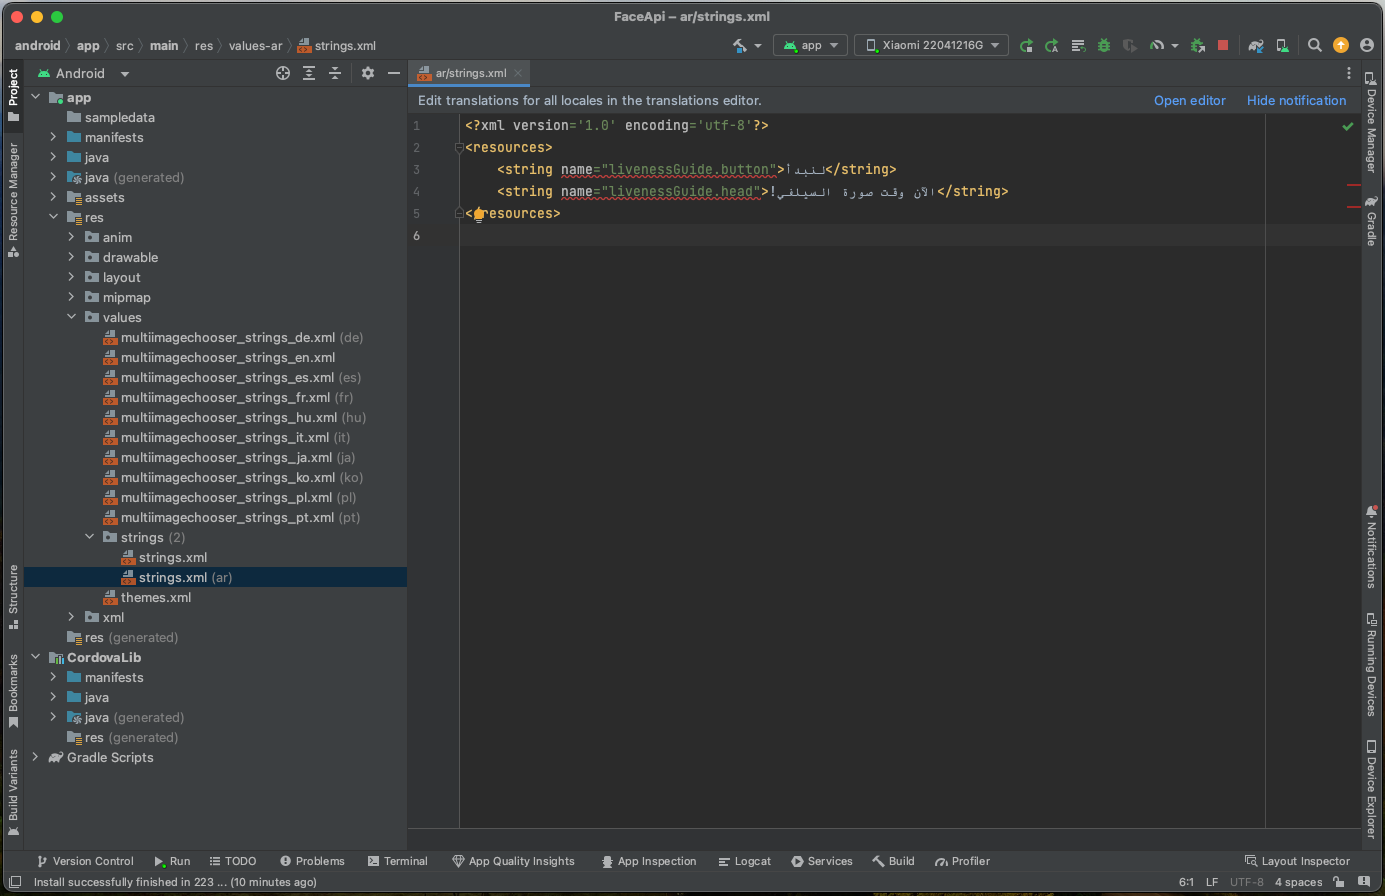
1. Create a strings.xml file and add text strings in your language. You can find all the localization keys in the FaceSDK.strings file at platforms/ios/Pods/FaceSDK/FaceSDK.xcframework/ios-arm64/FaceSDK.framework/FaceSDK.bundle/en.lproj/FaceSDK.strings.
2. Run Android Studio.
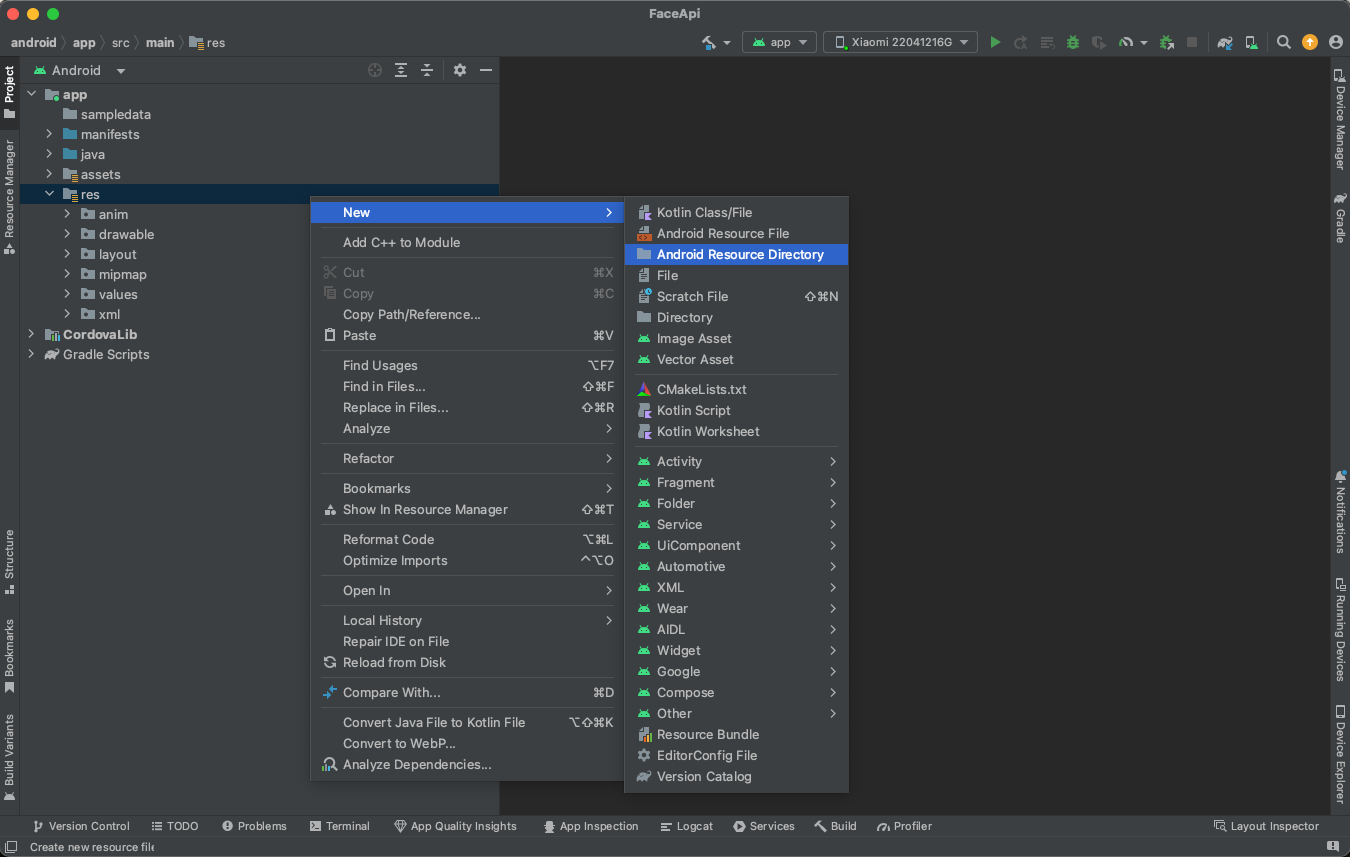
3. Select app > res, open options, and choose New --> Android Resource Directory:
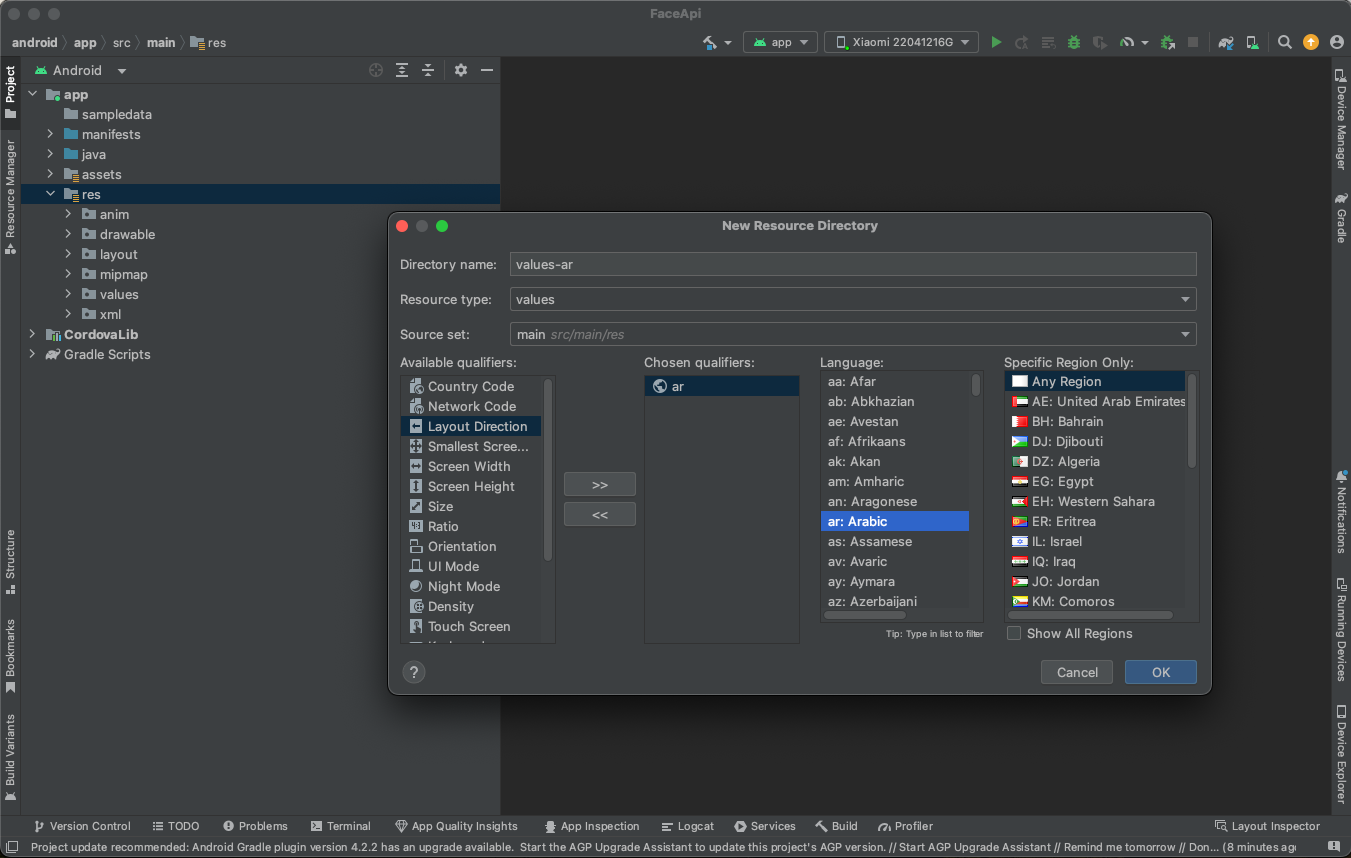
4. Apply the Locale filter, select the required language, and click OK:
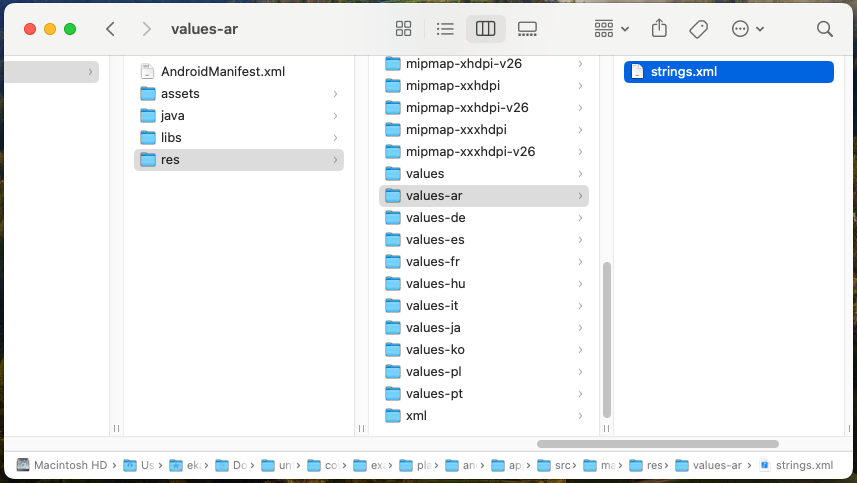
5. Put the strings.xml file to the app/src/main/res/values-XX/ directory:
Now, you edit this file in Android Studio: