Release Notes 5.6
All Devices
Added
Report page orientation
Added the option to select page orientation in reports:
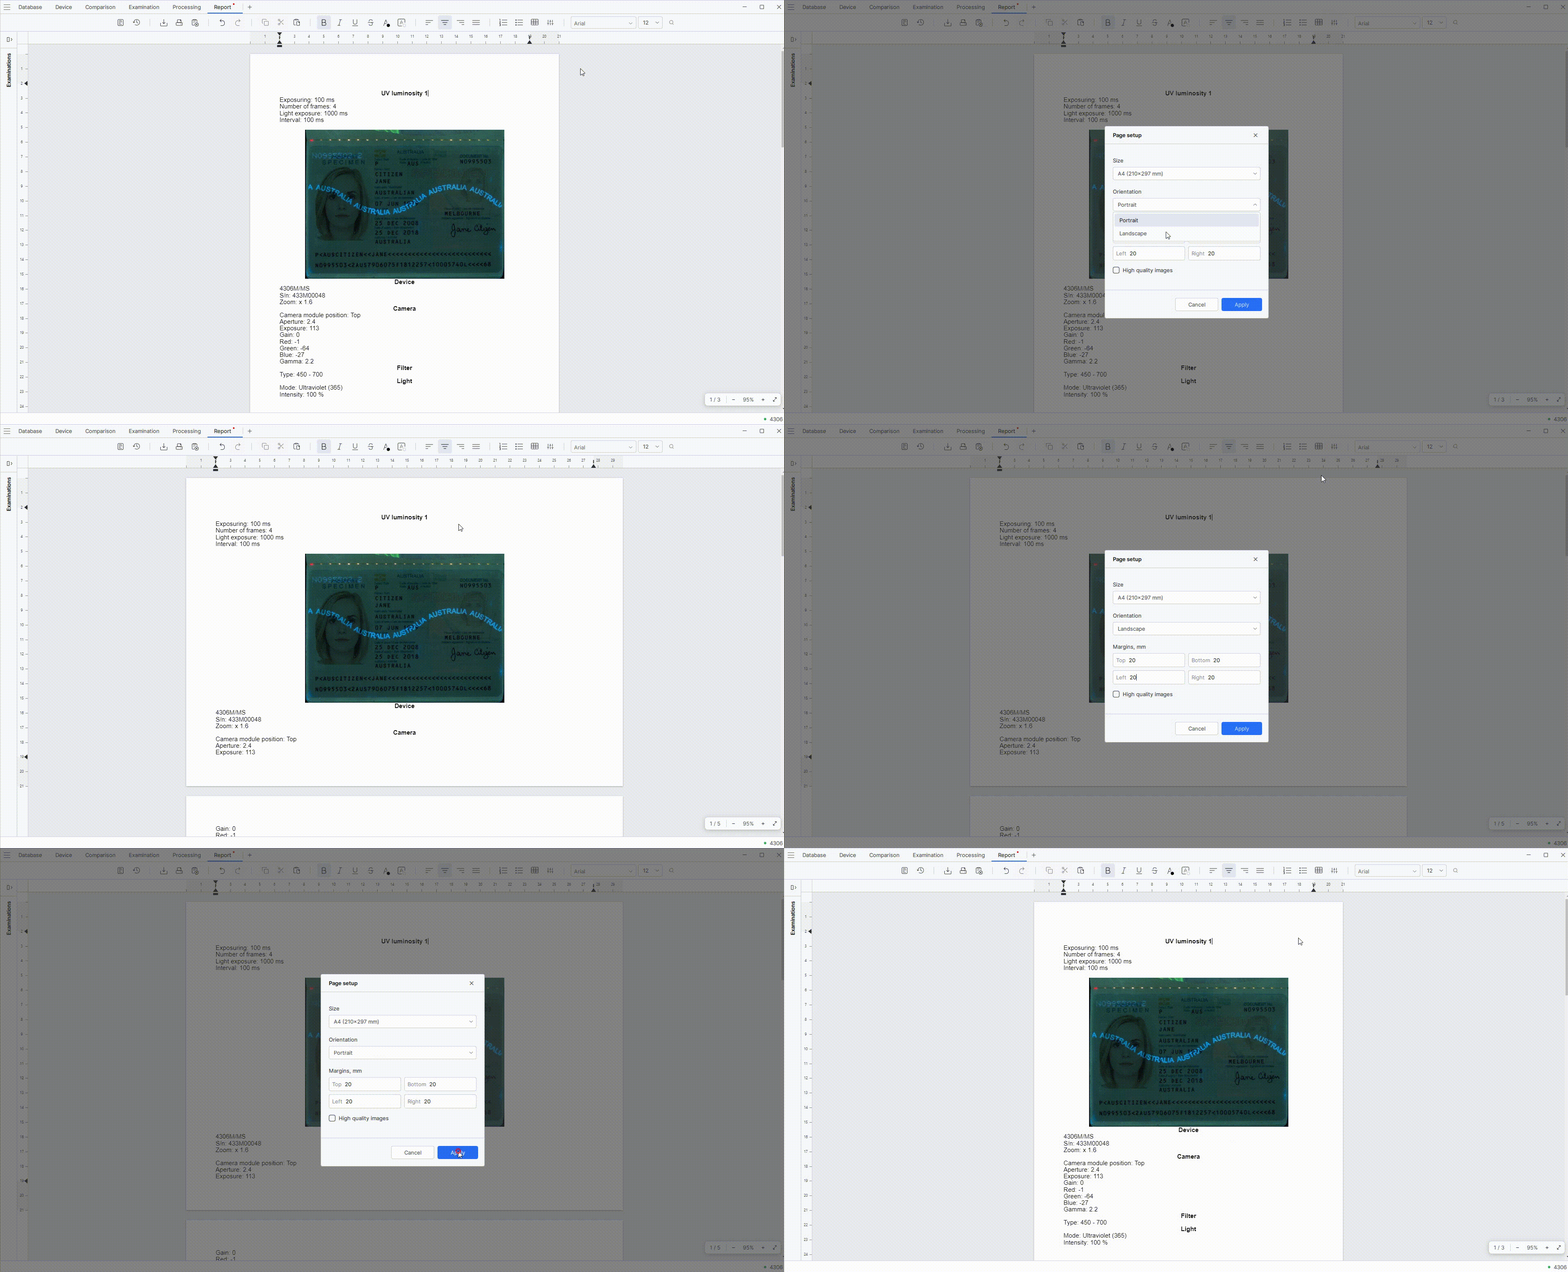
To set the page orientation in a report, follow these steps:
- On the toolbar at the top of the page, click Settings.
- In the Orientation field, select Landscape or Portrait orientation for the pages.
- Click Apply to save the changes.
Face capture for comparison
Added the option to capture a face using the camera for comparison when reading the MRZ and running Automatic Authenticity Verification:
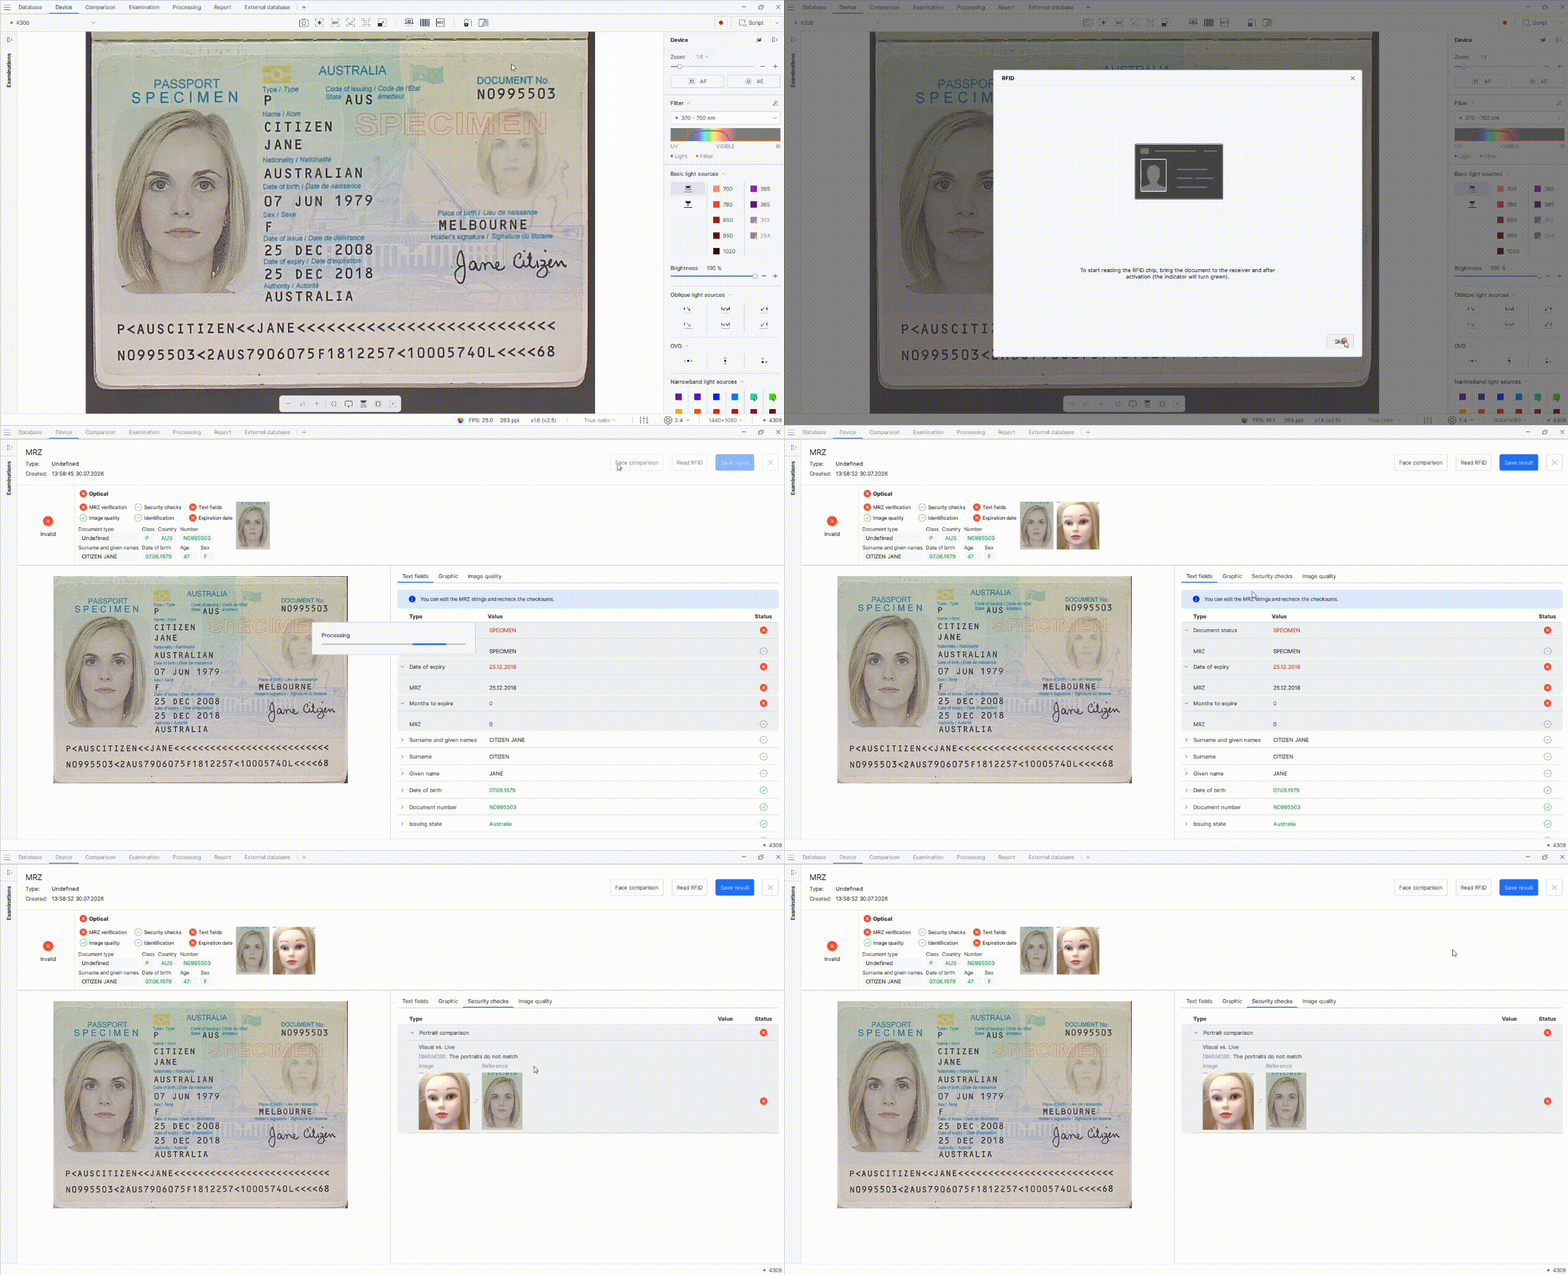
To compare a face captured by the camera when reading the MRZ or running Automatic Authenticity Verification, follow these steps:
- On the Device tab, start MRZ reading or Automatic Authenticity Verification.
- In the window displaying the data reading results, click Face comparison. The camera will turn on.
- Look into the camera.
The face image captured by the camera will be added for comparison with the data read from the document. The comparison results appear on the Security checks tab.
Opening saved files from notifications
Added the option to open a saved file in the database by clicking the notification that the save operation is complete:
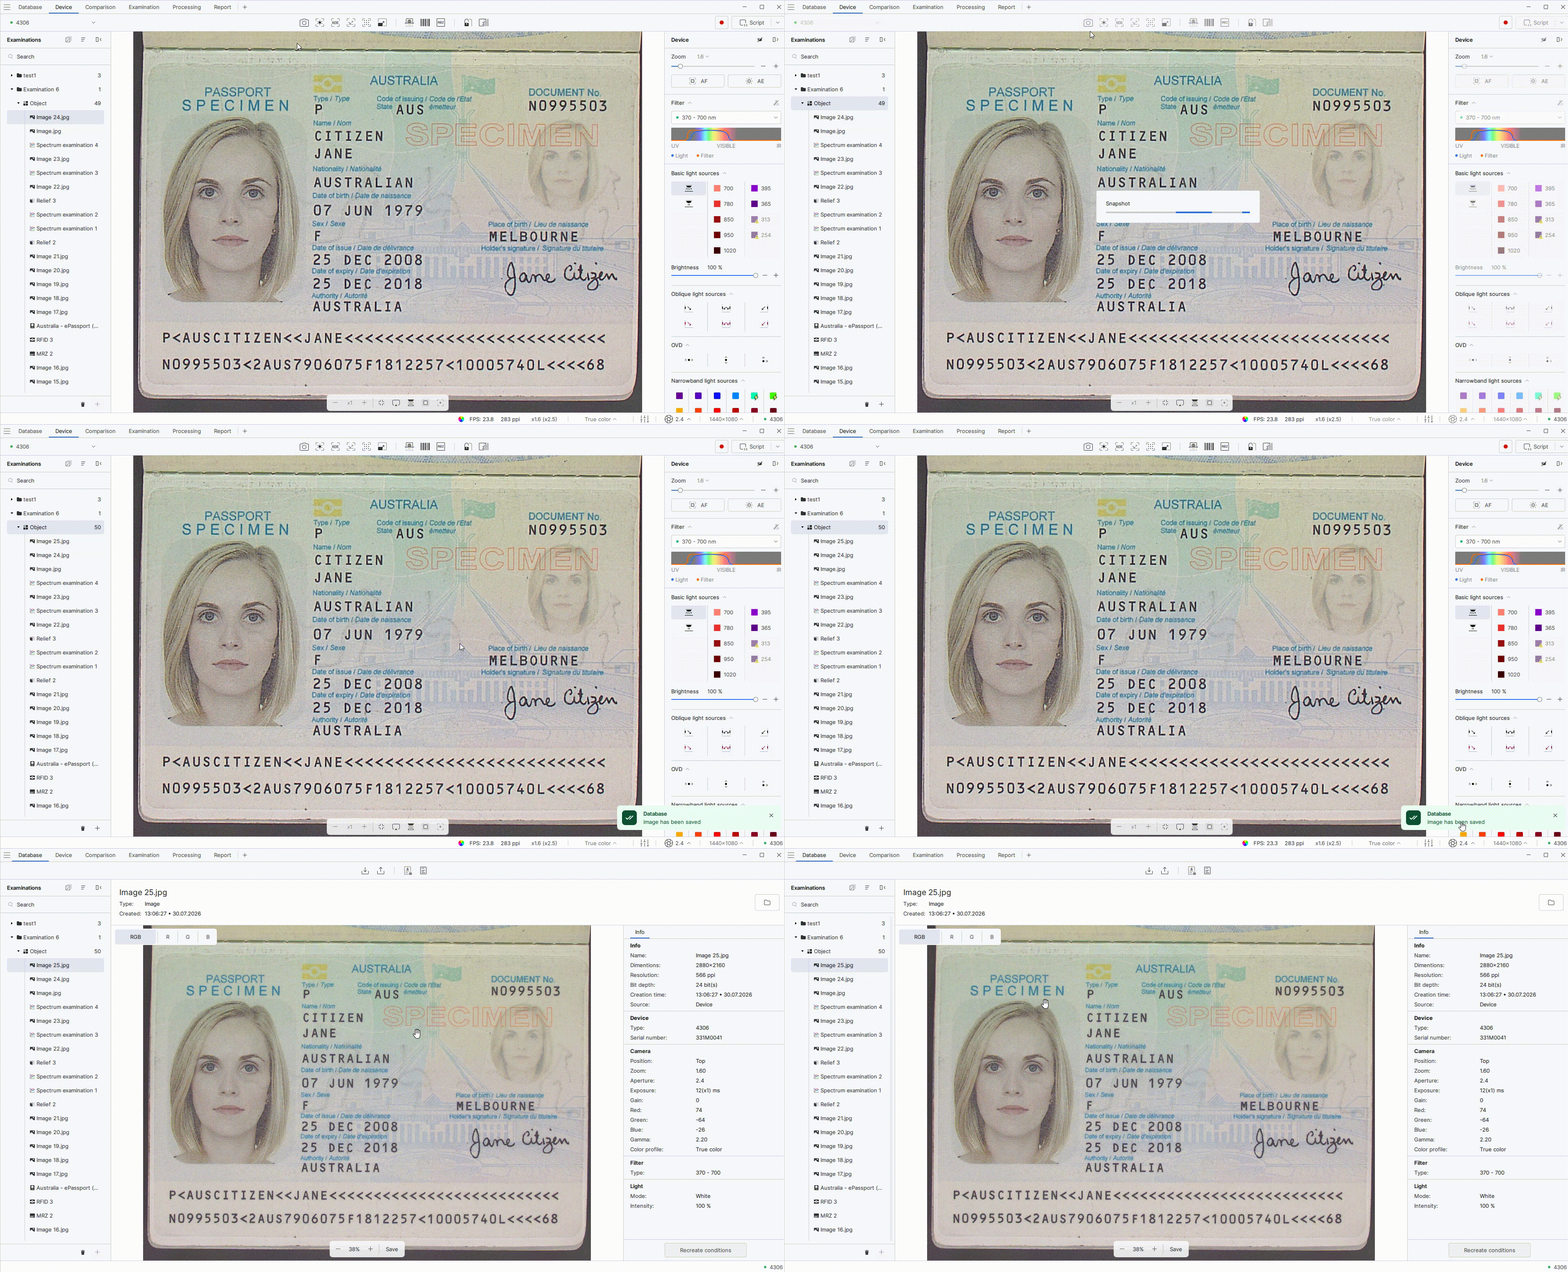
To open the saved file in the database, follow these steps:
- Save the file. You can also capture any image or save the examination or comparison results.
- A message confirming that the data has been saved to the database will appear in the lower-right corner of the screen. Click the message. The saved file will open on the Database tab.
Report Header and Footer
Added the option to configure report header and footer. Header and footer can contain text, images, and page numbers. After a report is saved in PDF or Word format, header and footer are displayed in the document. They can be edited in Word:
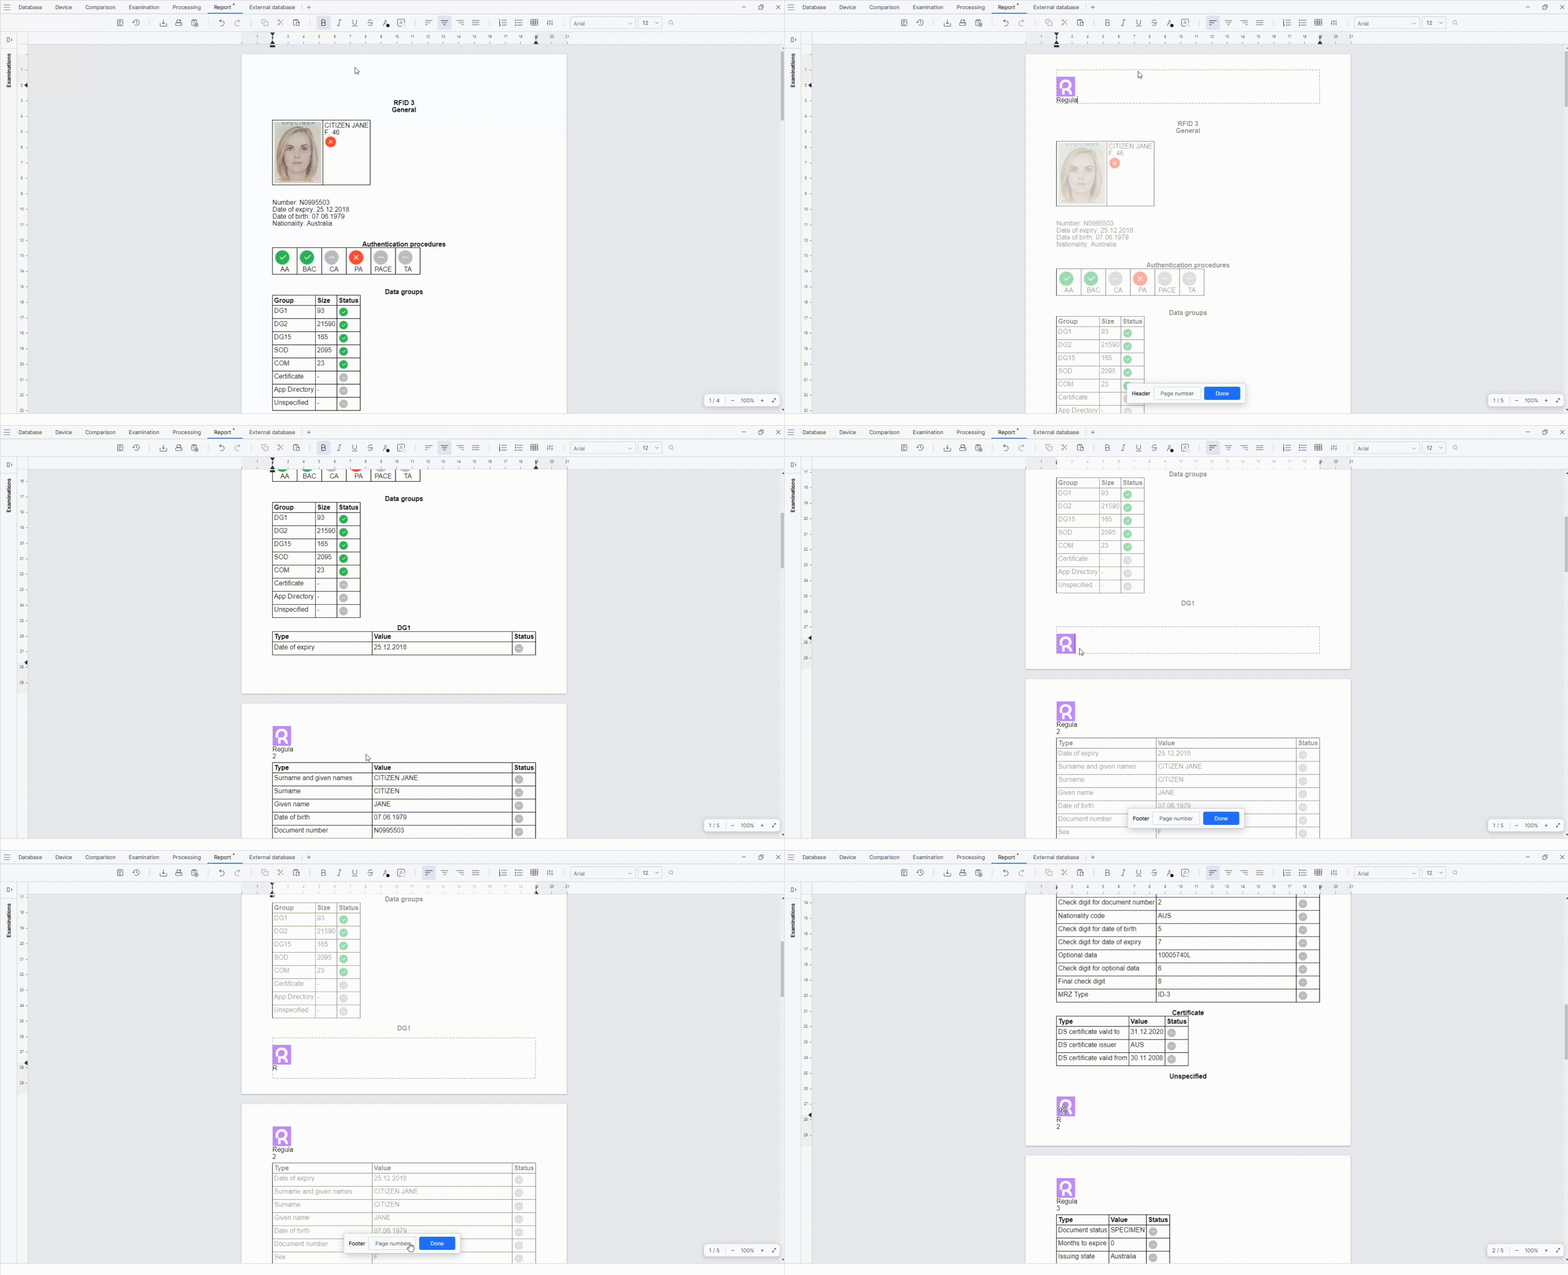
To add a header:
- Double-click the top of the page with the left mouse button.
- In the header editing area that opens, you can insert an image and text. To insert page numbering, click Page number.
- Click Done to save the changes.
To add a footer:
- Double-click the bottom of the page with the left mouse button.
- In the footer editing area that opens, you can insert an image and text. To insert page numbering, click Page number.
- Click Done to save the changes.
Hyperlink in Reports
Added the option to insert hyperlinks into reports. Hyperlinks can be edited, removed, cut, copied, and pasted:
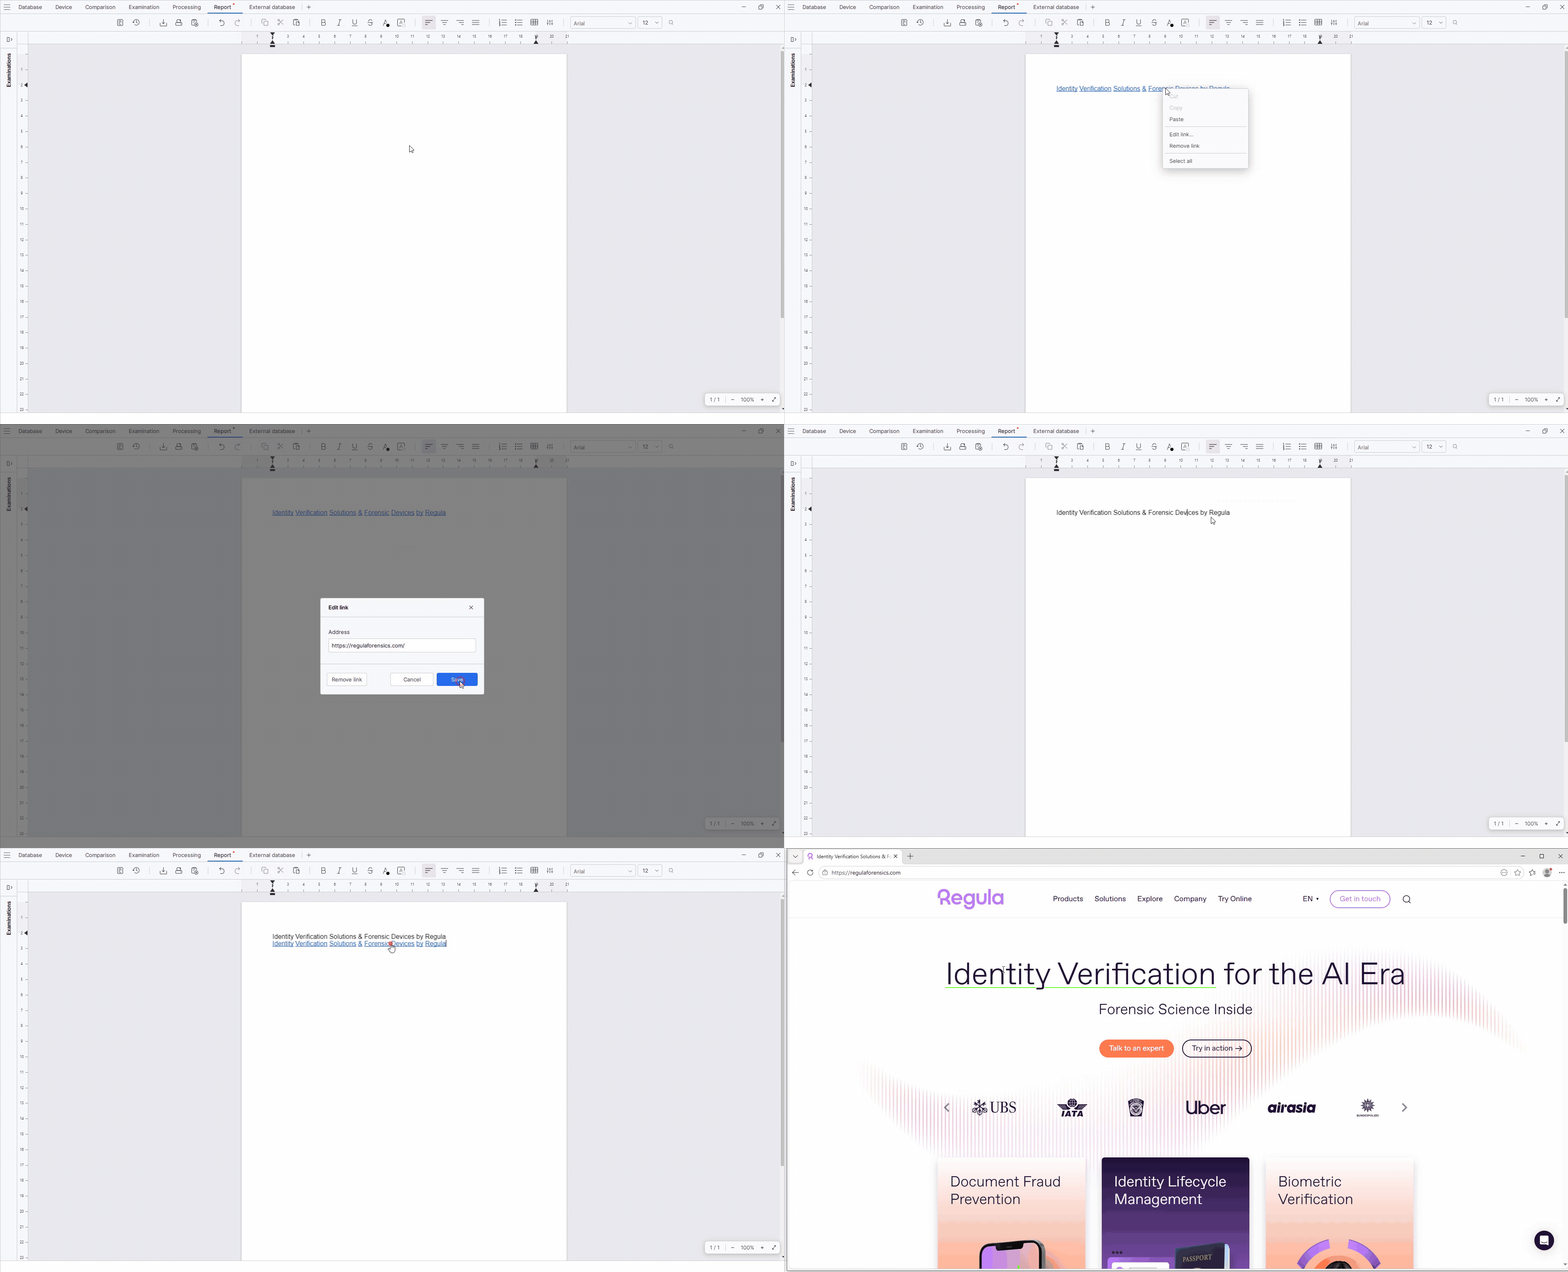
To work with a hyperlink, follow these steps:
- Insert a hyperlink into the report.
-
Edit:
- Right-click the hyperlink and select Edit link.
- In the window that opens, edit the hyperlink in the Address field and click Save.
-
Remove:
- Right-click the hyperlink and select Remove link.
or
- Right-click the hyperlink and select Edit link.
- In the window that opens, click Remove link.
-
Open:
- Hold down Ctrl and left-click the hyperlink. The hyperlink will open in the browser.
Report history
Added report history. The results of previous reports are saved and displayed in a common list for quick viewing and searching:
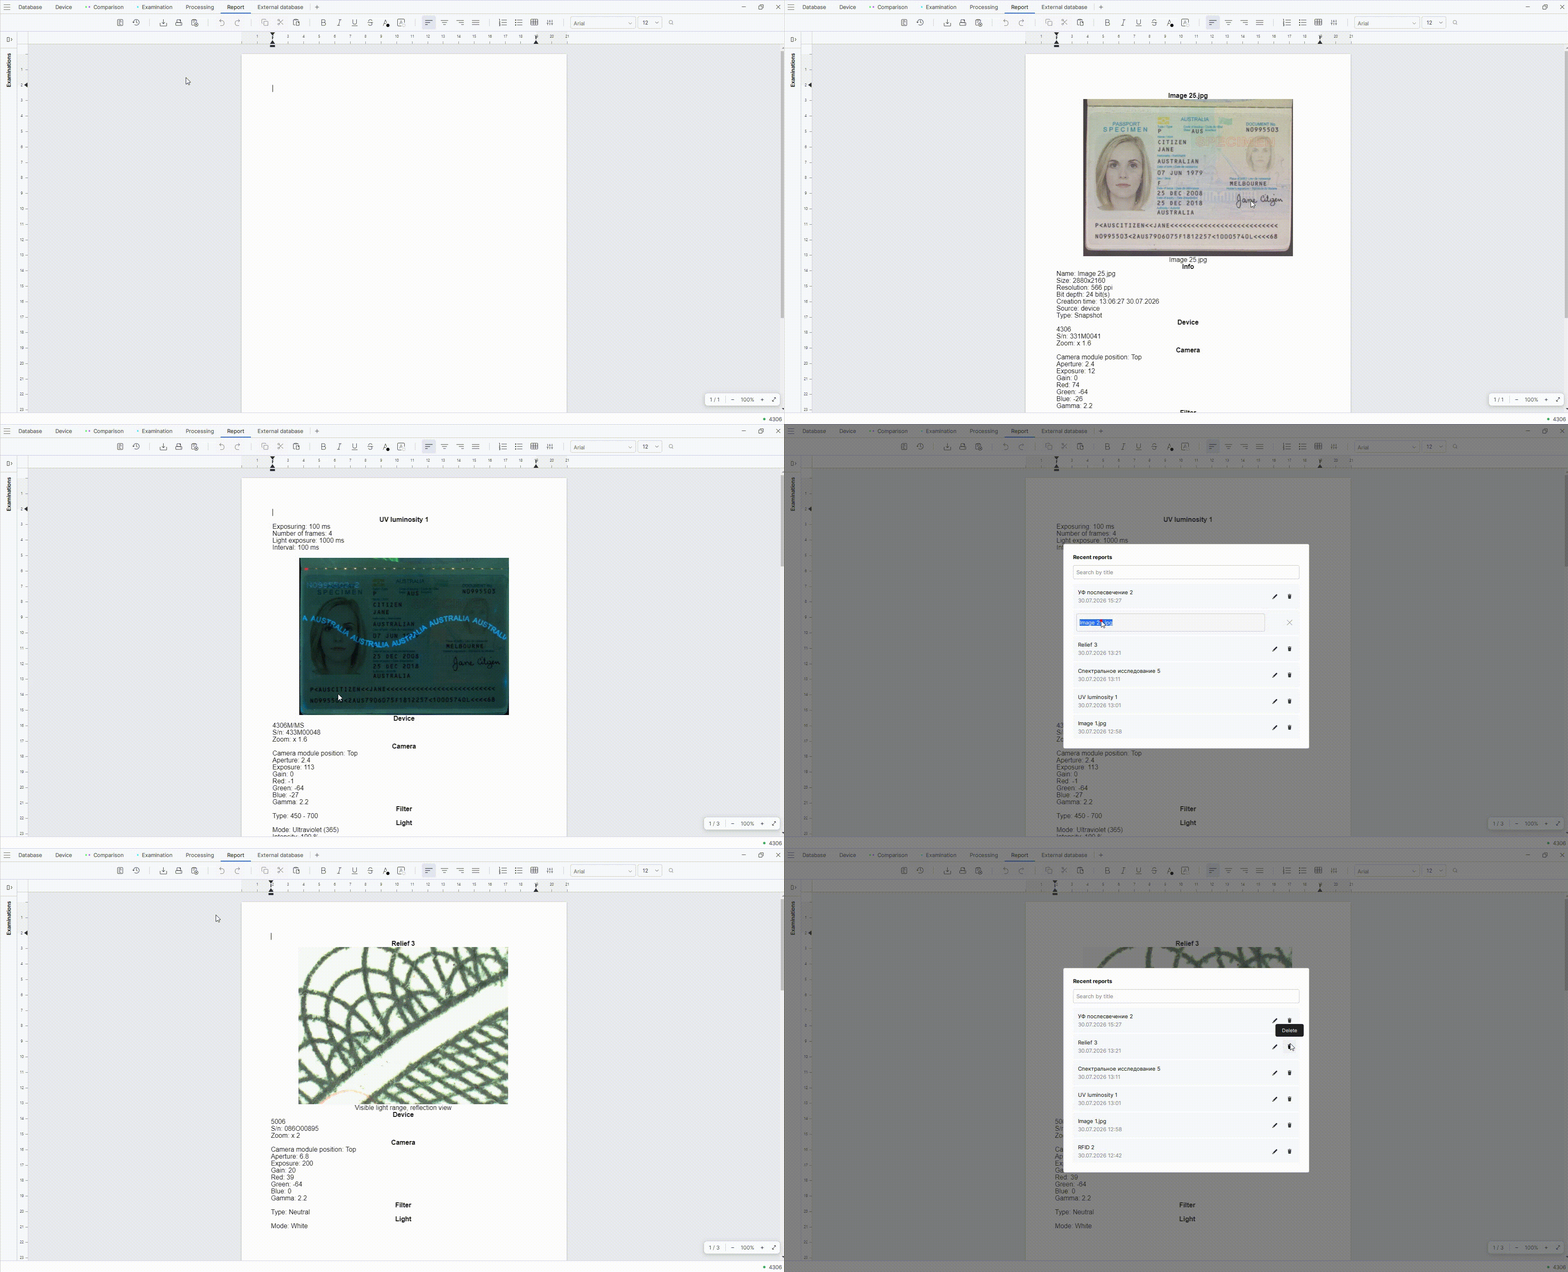
To view the results of previous reports, on the Report tab, click Recent reports on the toolbar. In the window that opens, you can:
- Search for a report by name.
- Open a report in the editor by clicking it.
- Edit a report name. To do this, click the Edit icon to the right of the report name. Edit the name and click anywhere on the screen to save the changes.
- Delete a report. To do this, click the Delete icon to the right of the report name.
Font search and page margins
Added font search by name and the option to adjust the vertical and horizontal page margins:
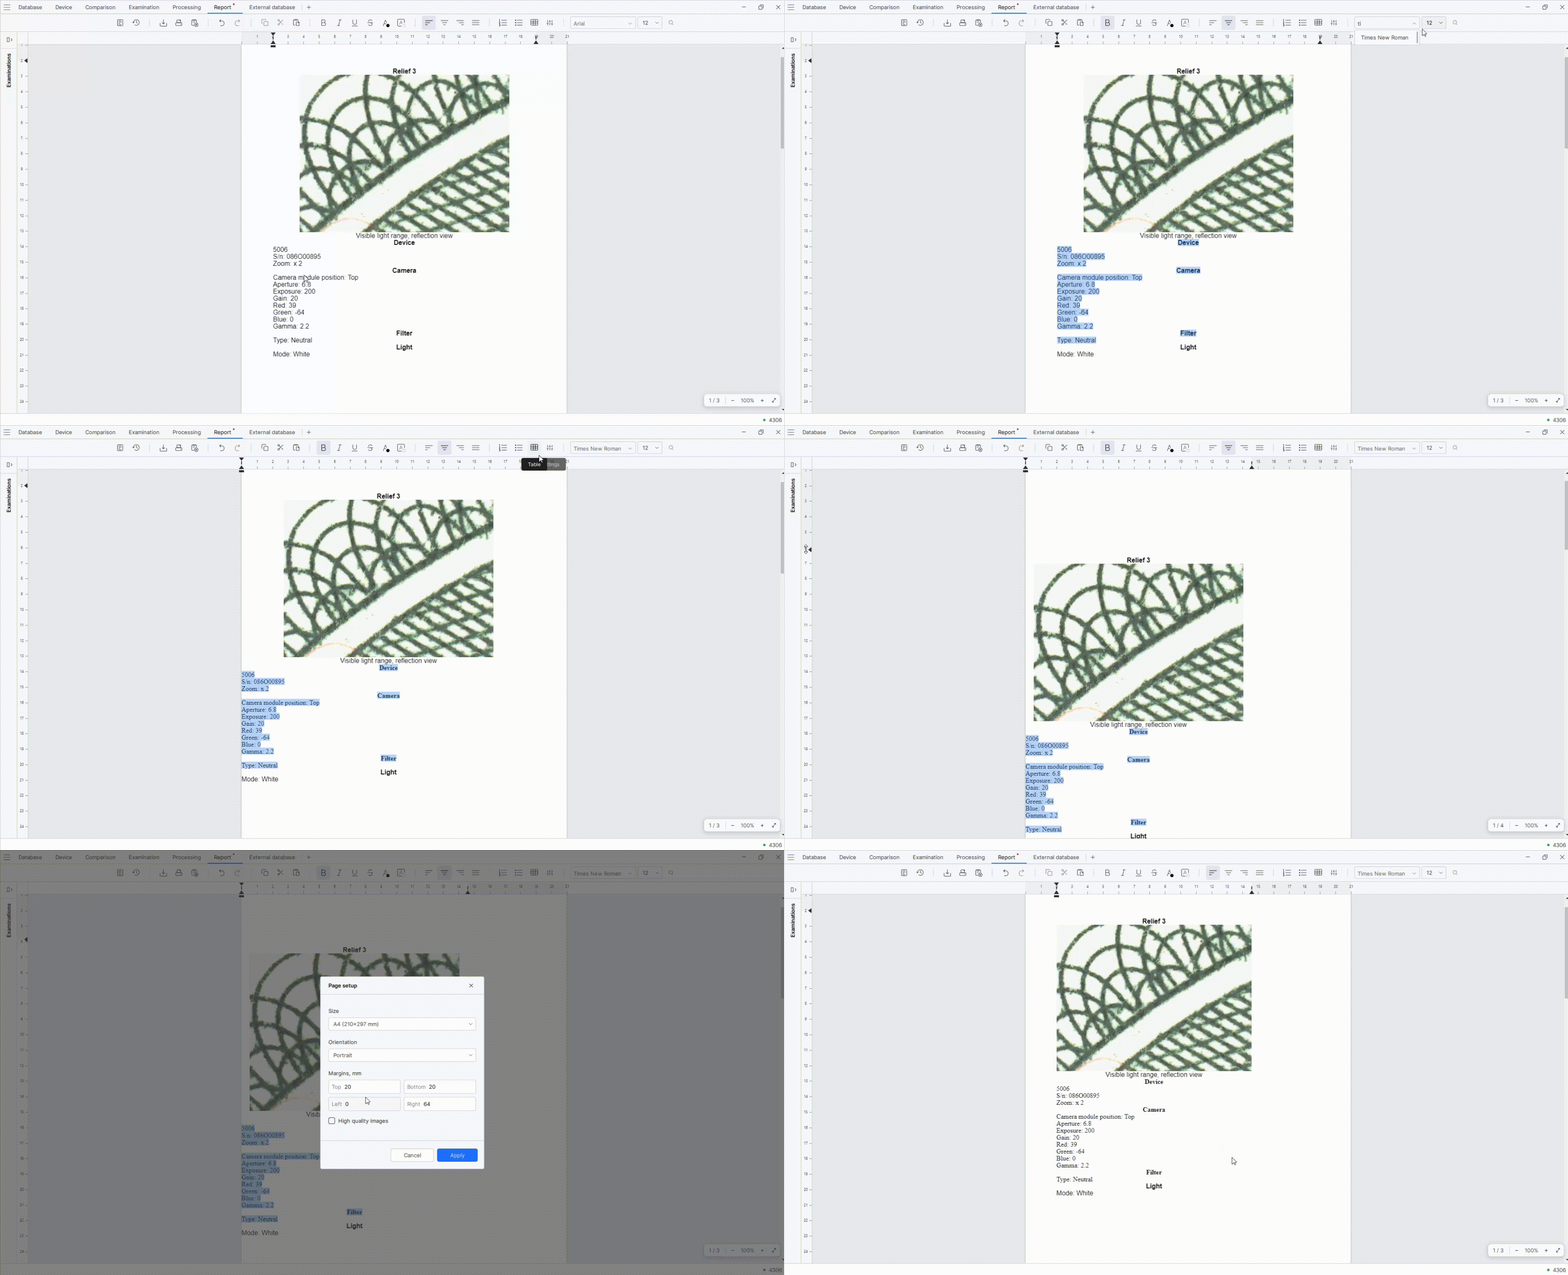
To change the text font, on the Report tab, click the font drop-down list on the toolbar. Enter the name of the required font.
To adjust the vertical and horizontal page margins:
- Use the sliders on the vertical and horizontal rulers.
Or
- On the toolbar, click Settings. In the window that opens, enter values in the fields.
- Click Apply to save the changes.
Report tab zoom
Added the option to zoom the editor on the Report tab:
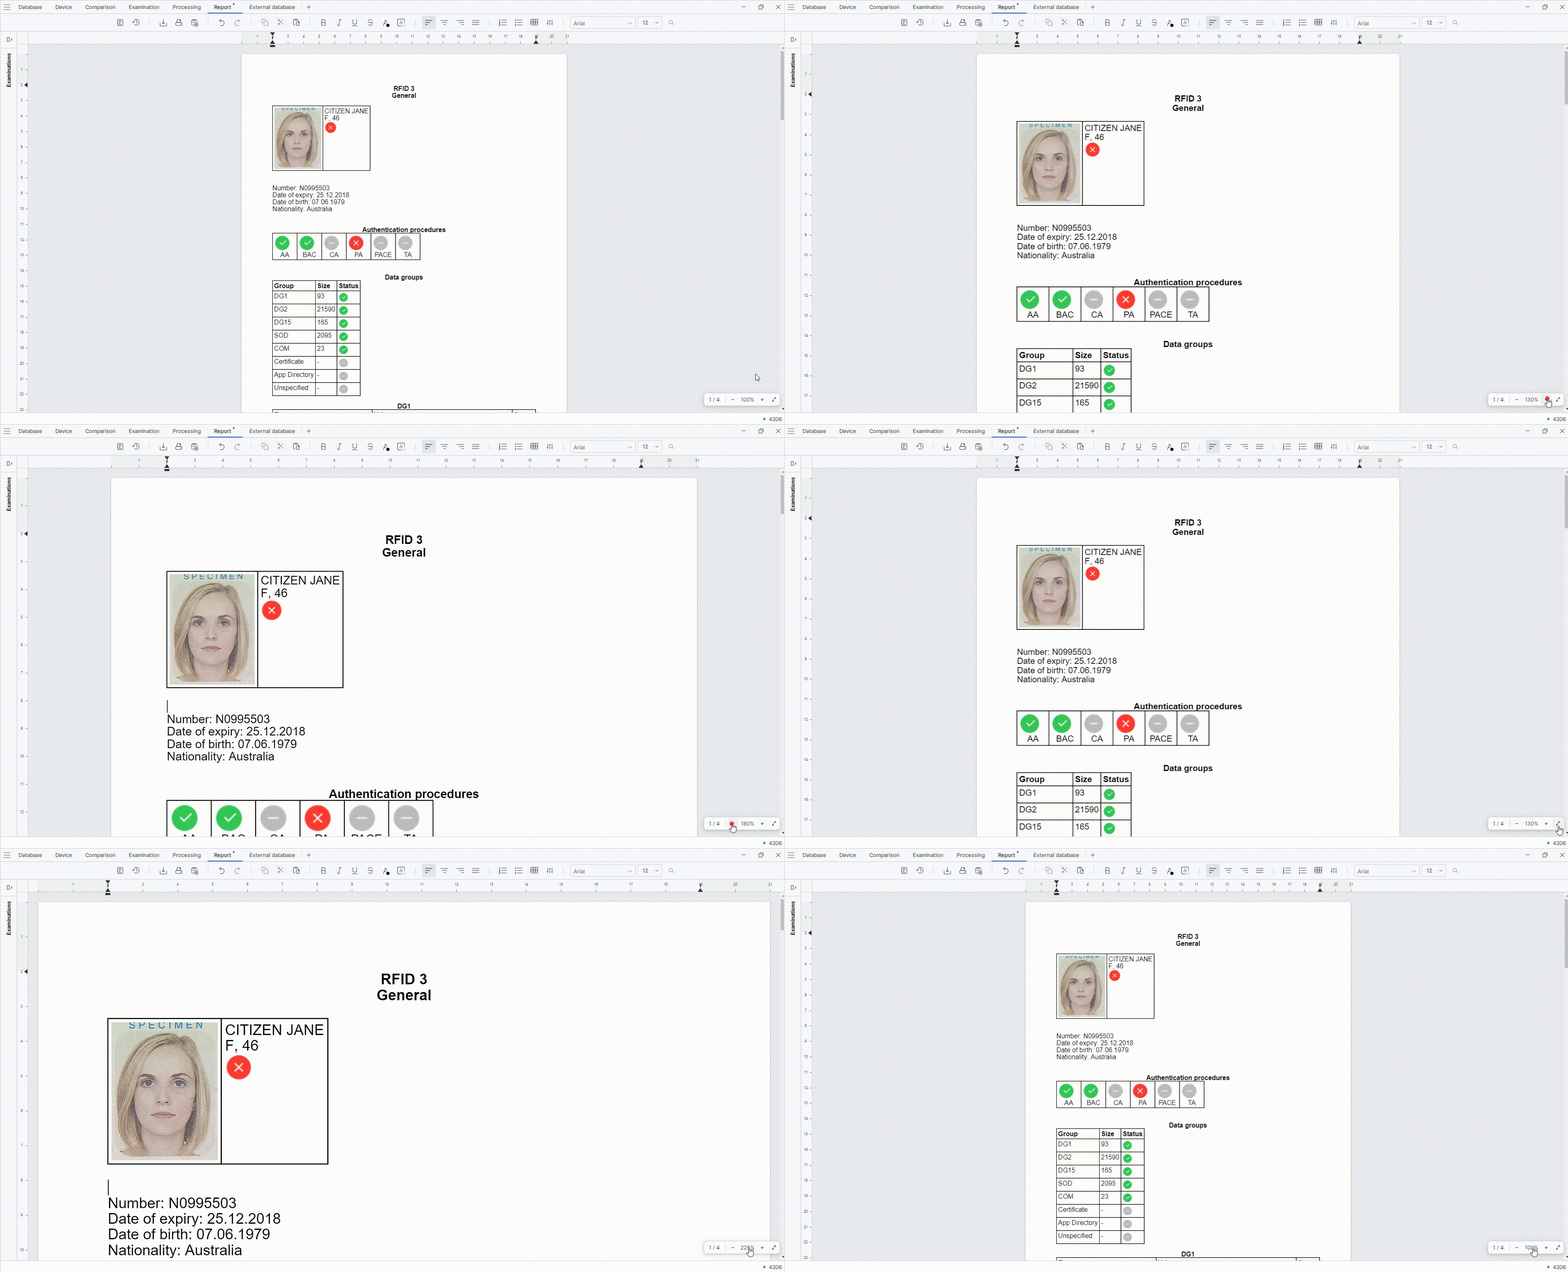
The following options are available for changing the zoom level of the displayed report:
- Click + to zoom in.
- Click - to zoom out.
- Click Full screen to open the report in full-screen mode.
- Click the zoom percentage to reset the zoom level.
4198 support
Added support for the Regula 4198 device on 43XX devices:
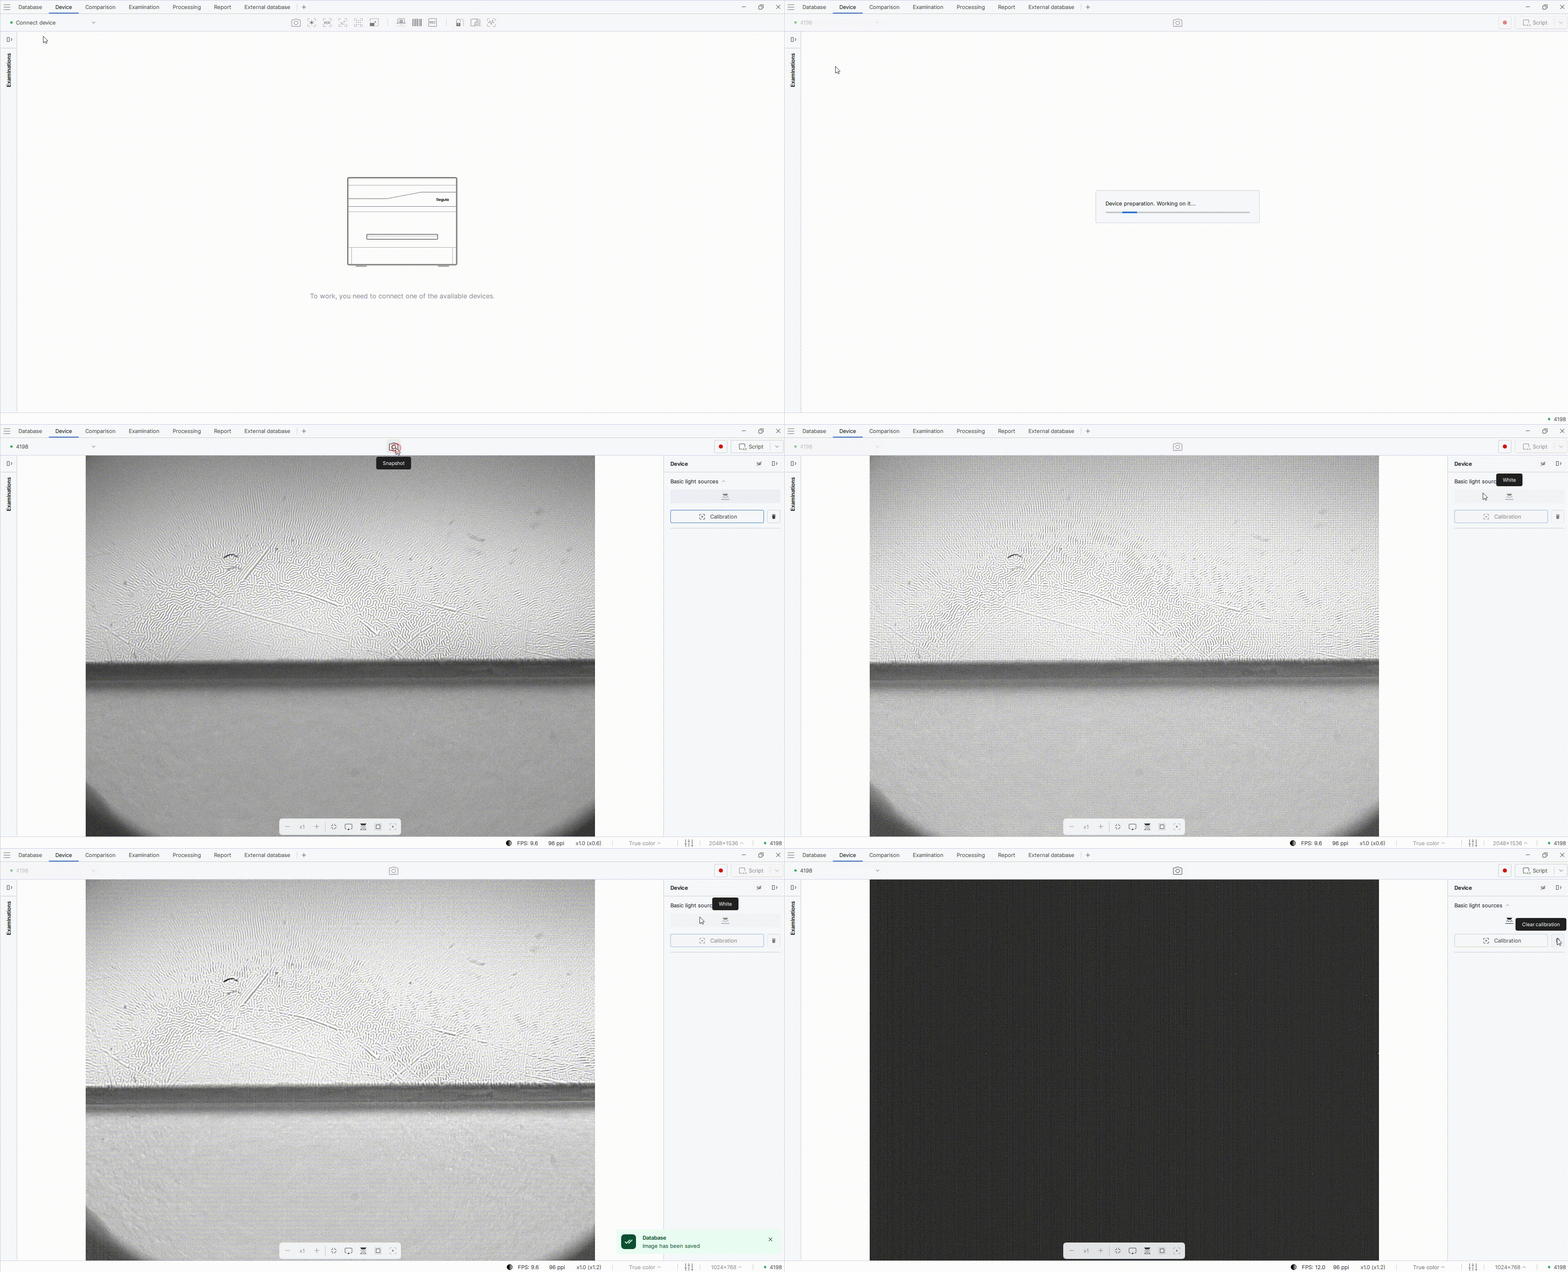
The Regula 4198 device can be used to visualize and examine magnetic document security features. The device detects their presence, determines their location, and enables assessment of the magnetic material distribution in the examined object.
To connect the Regula 4198 device, follow these steps:
- On the Device tab, open the drop-down list of connected devices and select device 4198.
- Lift the device and click Calibration.
- Capture an image of the examined object.
You can also turn the light source on or off and delete the calibration result.
LetterScreen information
Added LetterScreen information to the document reading results.
Autofocus and Auto-Exposure button tooltips
Added tooltips for the Autofocus and Auto-exposure buttons, displayed when the pointer hovers over them.
Fixed
-
Fixed an issue with reading RFID chips after replacing the document stage while the device was operating.
-
Fixed the filter graph display for a dual-turret device.
-
Fixed an issue where the zoom value reset from 57 to 40 when zooming in using the + key.
-
Fixed the display of the coordinate stage control and parameter adjustment panels in Live video mode on the Comparison tab.
Updated
-
Updated the Face comparison icon on the Examination tab.
-
Updated the 4305DMH firmware in accordance with change notice RGVI.005468, the 4308 firmware in accordance with change notices RGVI.005528 and RGVI.005512, and the 4308M firmware in accordance with change notice RGVI.005500.
-
Migrated the RFS build and runtime environment to QT 6.8 to support new platform capabilities and QT WebEngine integration.
-
Developed abstractions and data structures for implementing external device control.
4308
- Increased the maximum focus value for the upper and lower device cameras to 2097.
4308M
- Added a new 810 nm IR light source.
4205M
Added
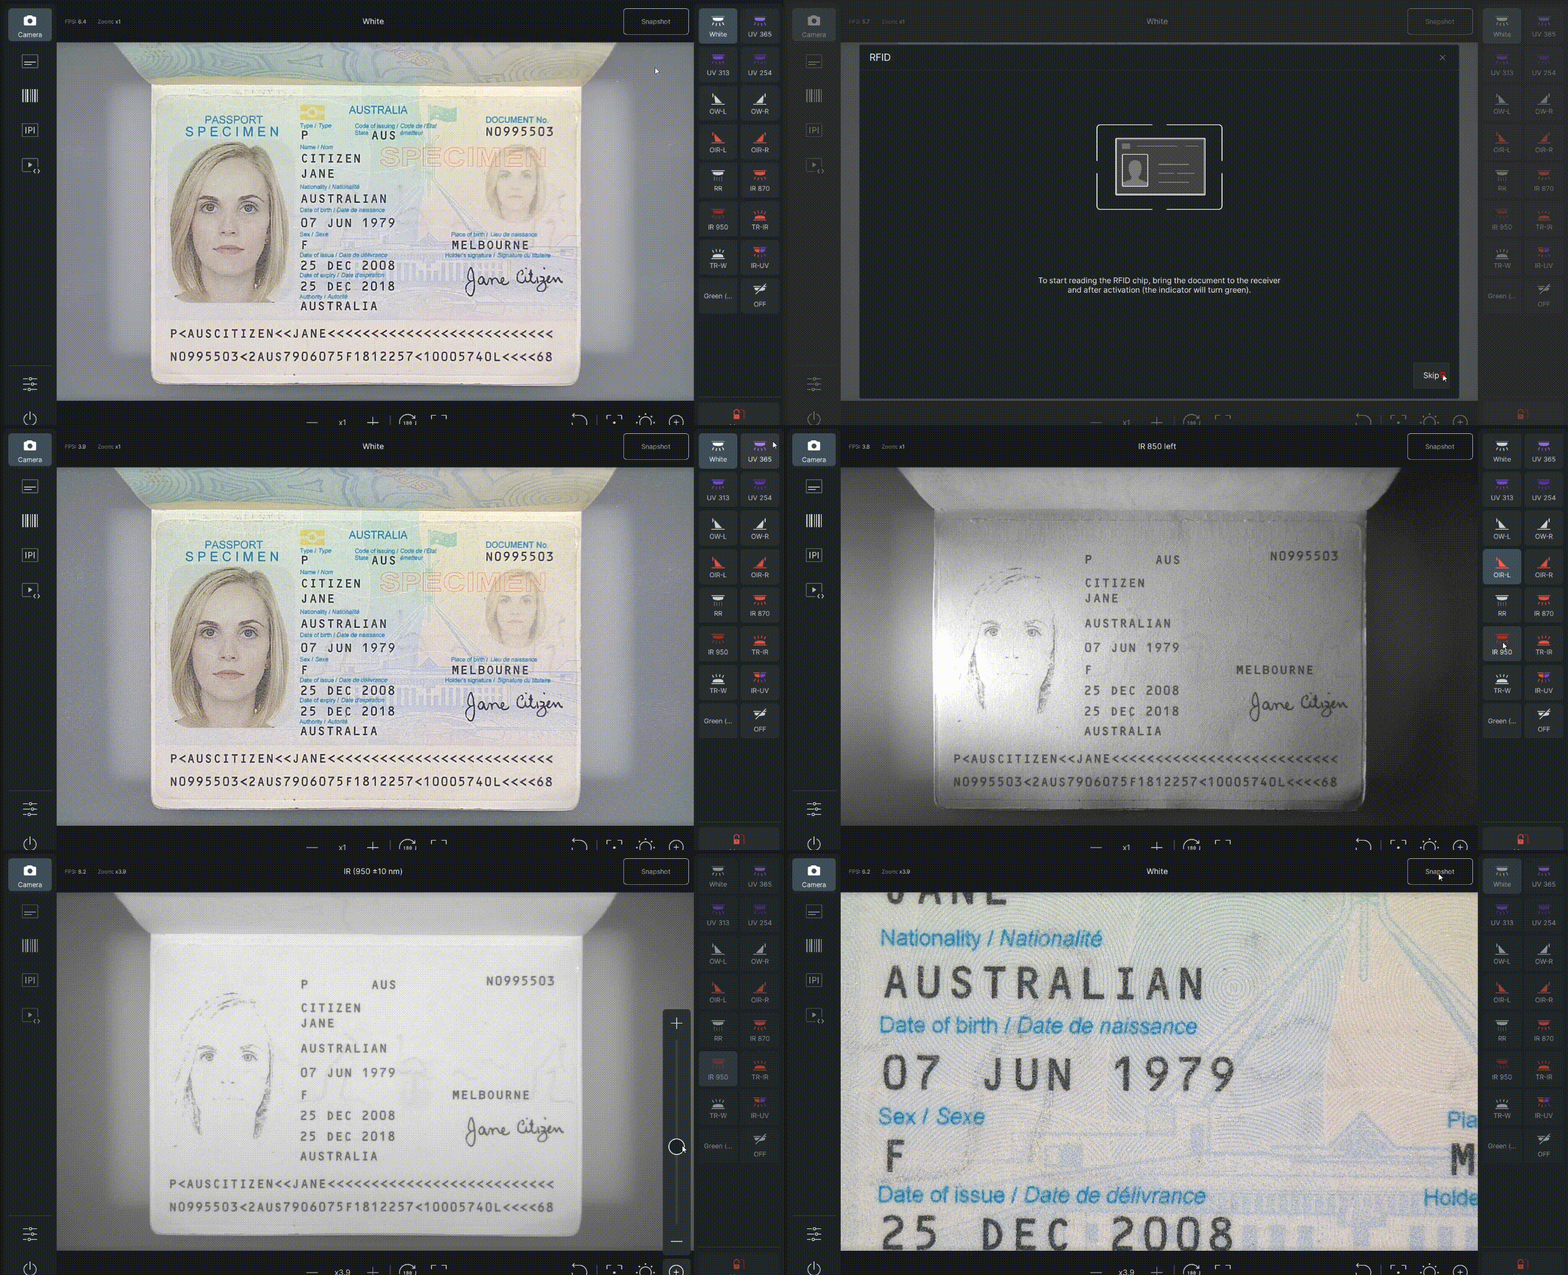
- Added support for the 4205M device. Developed a new device control interface, including light source switching, a new menu for reading MRZ, barcodes, and IPI, and a new settings menu:
-
Developed a new interface for switching the device light sources.
-
Added M-tag mode. Alternating the 870 and 950 nm upper IR light sources makes it possible to identify differences in the absorption of IR radiation by the examined materials.
-
Added light source sequence settings. Users can add any number of light sources, change their activation order, or remove them from the sequence. After configuration, the Next:
<light source name>button appears on the work panel. Each time the button is pressed, the light sources are activated one after another in the specified order. -
Added the option to set the automatic light source shutoff time in the user interface.
-
Added a portrait area display when reading IPI. When the IPI button is pressed, a frame showing an example of the portrait position and a text prompt appear on the screen.
-
Added autofocus by tapping the screen.
-
Developed a new Touch UI-based interface optimized for touchscreen operation.
-
Added dialog boxes displayed when reading MRZ, RFID, barcode, and IPI data.
Fixed
- Fixed a crash in the 4205D application when reading a French passport.
4205D
Added
- Added Latvian language support.
Fixed
- Fixed device shutdown while the 4205D application is open. After the Turn off device button is pressed, the device shuts down correctly without the loading indicator being displayed indefinitely.